Jackite Pole Locking Pin

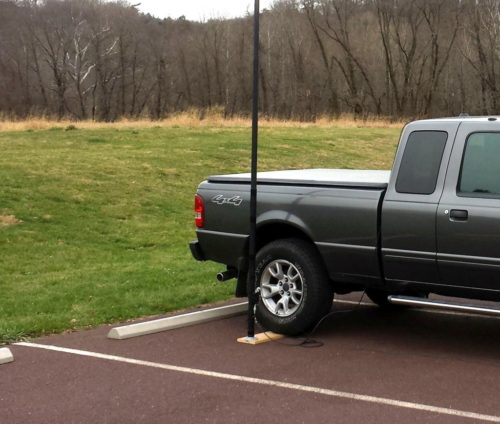
Here’s a quick little hack that might come in handy if your Jackite pole should suddenly collapse in windy conditions. It’s very easy to do and costs nothing, depending on what you have in your junk box.

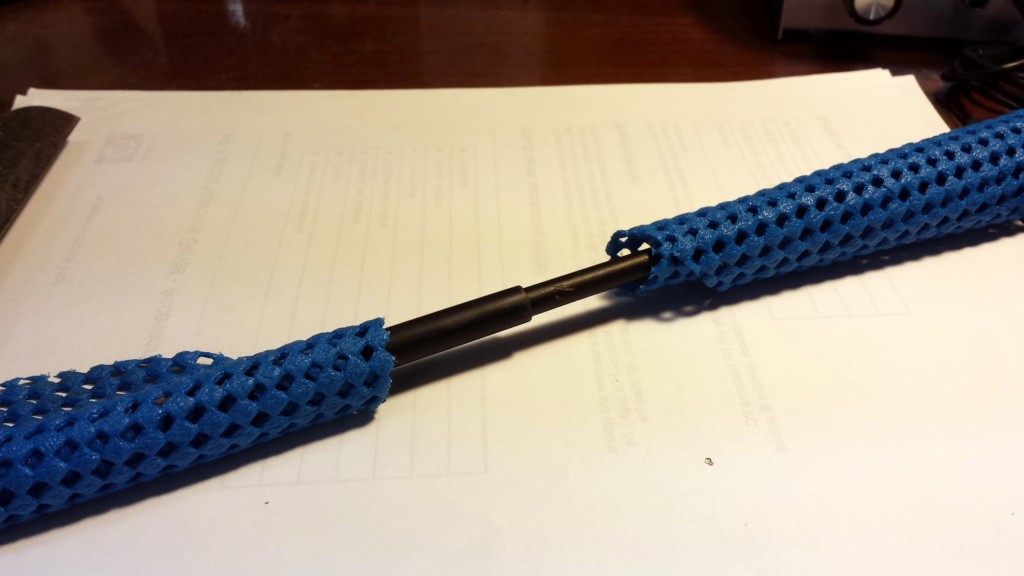
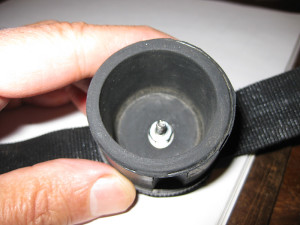
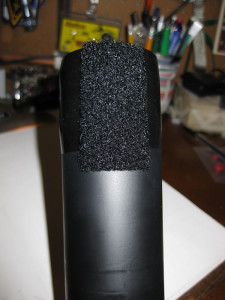
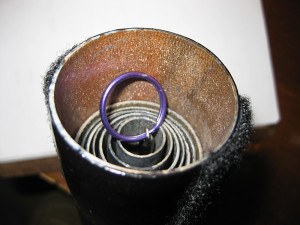
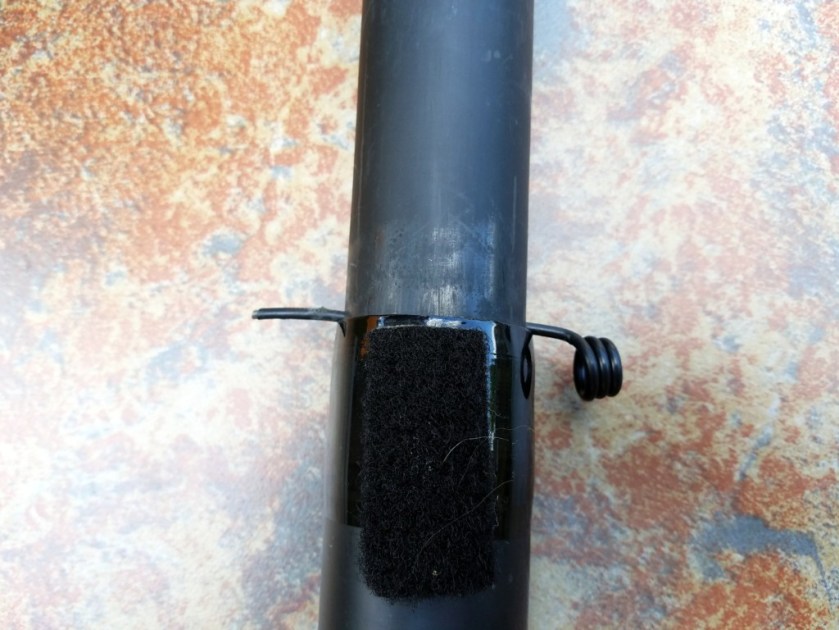
Once in a blue moon, in windy conditions, I have had my 28-foot and 31-foot Jackite poles spontaneously collapse. Usually, when it happens, it’s the second largest tube that collapses into the largest tube.  To remedy this, I drilled two 1/8-inch holes in the second largest tube right where it meets the largest tube. I drilled the two holes such that they were directly opposite each other. (See the accompanying pictures if my explanation is confusing.)

To remedy this, I drilled two 1/8-inch holes in the second largest tube right where it meets the largest tube. I drilled the two holes such that they were directly opposite each other. (See the accompanying pictures if my explanation is confusing.)

Jackite-Locking-Pin-Hole-500x375
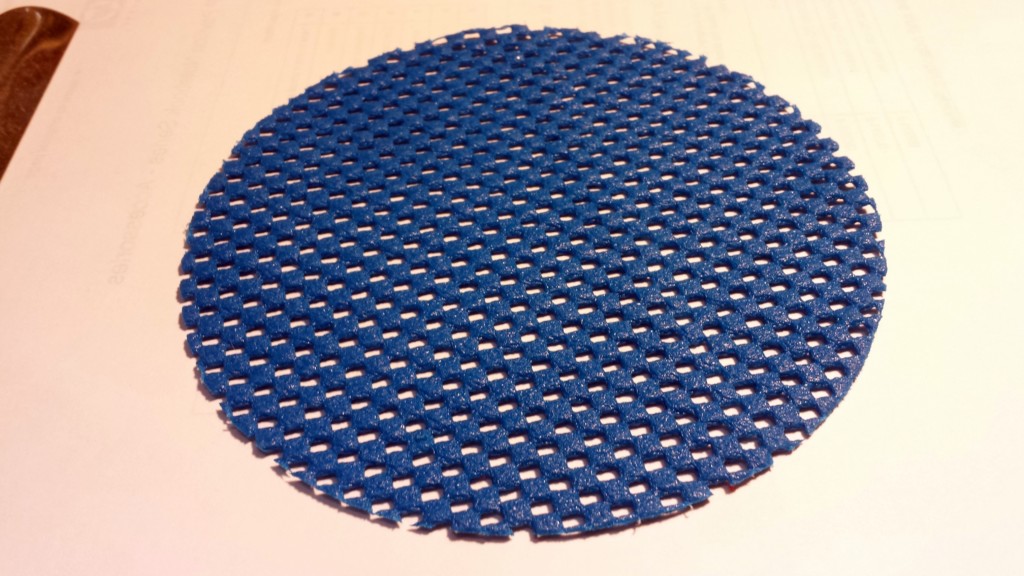
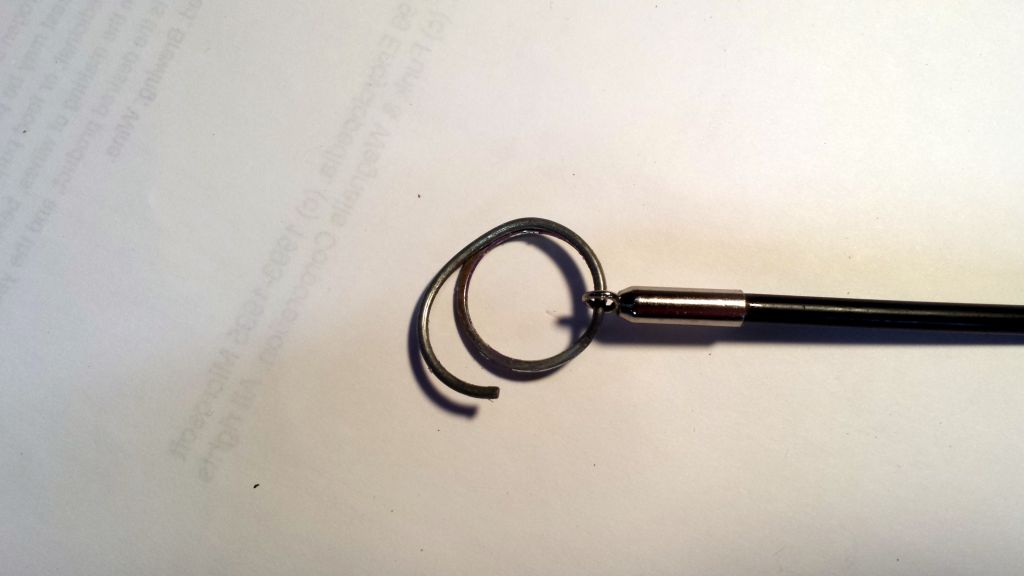
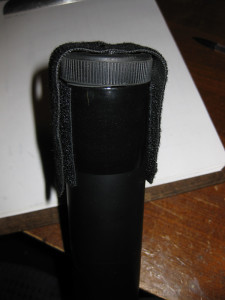
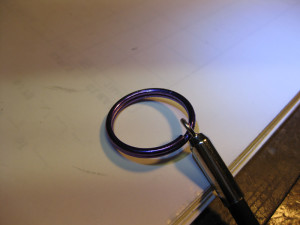
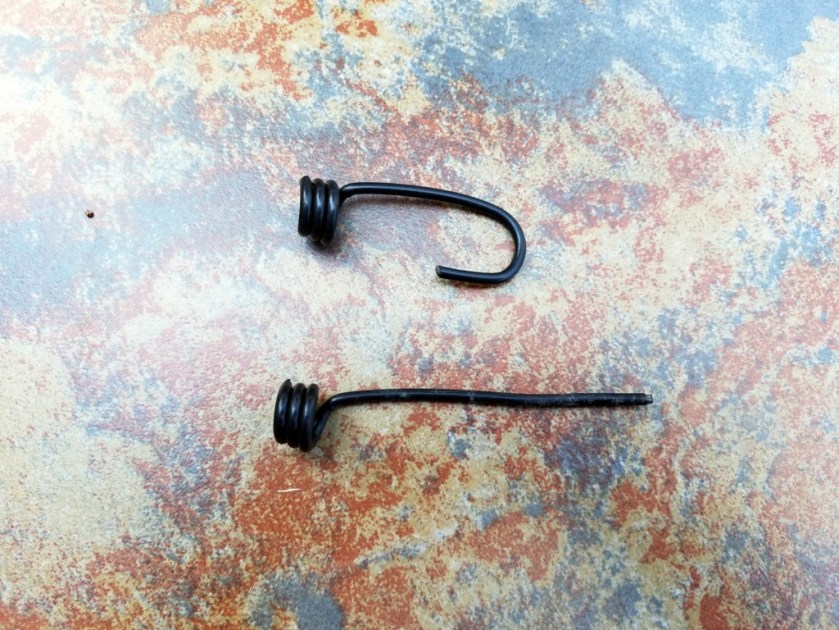
Here’s how it works. When the pole is fully extended, I just slide a pin through the two holes to prevent the pole from collapsing. For the pin, I used a hook from a bungee cord that I straightened out, using a pair of pliers. The resulting pin is just the right size and it has a nice rubberized coating on it. You could, of course, use something else (a nail, a piece of wire, etc.) for the pin.

These are the two pole sections with the locking pin inserted.
This is before (top) and after of the bungee hook I used for the locking pin.

I don’t usually use the pin, except in very windy conditions. I’ll definitely use it during my upcoming trip to the Outer Banks of North Carolina. My Jackite pole will be up for a week and facing some stiff ocean breezes.
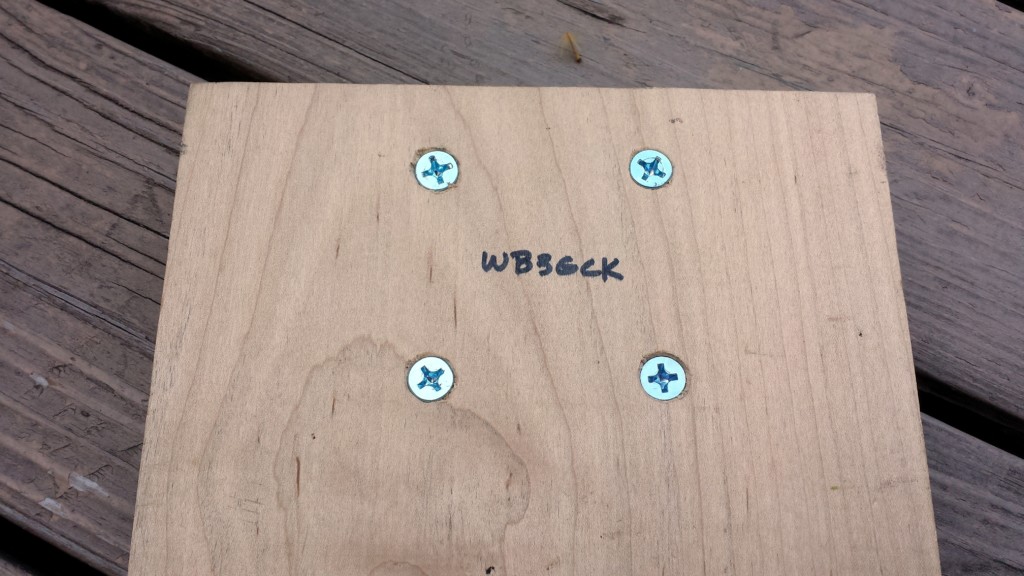
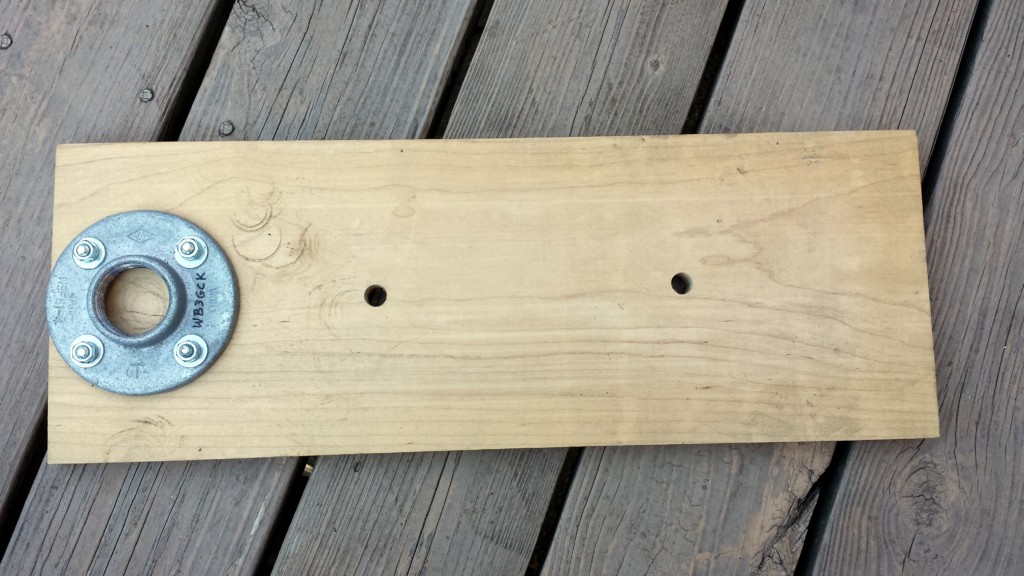
73, Craig WB3GCK

Drive-on Portable Antenna Support

[This is an updated description of the drive-on antenna support that I have been using for many years.  This version originally appeared in the July 2016 edition of QRP Quarterly in the “Idea Exchange” column.  You can still find the older article here.]

Here’s a simple, inexpensive drive-on mast support that I have been using for more than ten years now.  It’s been particularly handy for quick trips to the field, such as National Parks on the Air (NPOTA) activations.

Over the years, telescopic fiberglass poles have become popular as portable supports for lightweight antennas.  Two popular suppliers of these collapsible poles are Jackite (http://www.jackite.com/) and SOTABeams (http://www.sotabeams.co.uk/).  I typically use my 31-foot Jackite pole to support a vertical wire along the outside of the pole.  I have also used them to support lightweight dipoles and a variety of end-fed wire antennas.

One trip to your local hardware store will get you everything you need for this project.  To support a 31-foot Jackite pole, here’s what you’ll want to buy:

  • 1-1/4 inch floor flange
  • 18-inch length of 1-1/4 inch threaded steel pipe
  • (4) 1/4-20 x 1-1/2-inch flathead bolts
  • (4) 1/4-20 nuts
  • (4) 1/4-inch flat washers
  • (4) 1/4-inch lock washers
  • 18 to 24-inch length of 1×8 lumber (I used a piece of maple.  A piece of 1×6 lumber would also work)

[NOTE: I’ve heard that the dimensions of newer Jackite poles may be different. Use the dimensions given here as a general guide, and be sure to double-check the dimensions of your particular pole before buying materials.]

Figure 1. Drill 4 countersunk holes for the floor flange at the end of the board.

Assembly is pretty straightforward.  Drill four holes to mount the flange to the board.  The flathead bolts go in from the bottom.  You need to countersink the bolts so they will flush with the bottom of the board.  Attach the flange with the flat washers, lock washers and nuts.  That’s about it.

Figure 2. Here is the floor flange mounted on the board.

To use the mount, I just set it on the ground and run one of my vehicle’s tires up on it.  Next, I screw the threaded pipe into the flange.  Once the pole is fully extended and the bottom cap removed, I just slide the pole over the pipe.  For my 31-foot Jackite pole, I use a little electrical tape on the pipe to give a snug fit.

Figure 3. Drive onto the mount and screw in the pipe.
Figure 4. Drive-on mast in use supporting a vertical wire.

You can also adapt this for other size poles.  For my 28-foot Jackite pole, for example, I use a 1-inch pipe.  For my 20-foot Black Widow pole (https://www.bnmpoles.com/), I use a 3/4-inch pipe.  You can buy reducers (adapters) in the plumbing department that will allow you to use the smaller diameter pipes with the 1-1/4 inch flange.  If you only use one particular pole, you can always buy a smaller flange and build your mount with that.

This design is more than sufficient for a lightweight, telescopic fiberglass mast. If you need to support something heavier, like a steel mast, you’ll need a more robust support than this.

DE WB3GCK

More Jackite Pole Hacks

Here are a few more things I have learned, based on my experience using Jackite telescopic poles.  Although some of this might be fairly obvious stuff, hopefully, this will be helpful to some.

Dealing with Stuck Sections

About four months ago, I had the top two sections of my 31-foot pole become hopelessly stuck.  After trying several things, I stumbled across a solution (at least for me).

My wife came home from the store one day with one of those rubber pads that are intended to help you grip and remove the lids from stubborn jars.  A light went off in my head.  I bought a couple of them at the local dollar store and by using them to help me get a grip on each of the two stuck sections, I was able to twist them enough to get them unstuck.  A few months later, I again had two sections that became stuck.  I went right for the grip pads and was able to instantly get them unstuck.  I now keep a pair of these pads in my backpack for when I run into this problem again in the field.  As a bonus, these pads work great under your paddles or straight keys to keep them from sliding around on the table.

This is one of the jar lid grippers my XYL found at our local dollar store.

Just a piece of advice.  Don’t try to use pliers to get fiberglass mast sections unstuck.  You’ll create a bigger problem for yourself.  Don’t ask me how I know this.  Just trust me on this one.

When wrapped around the two stuck sections of a pole as shown, these jar lid grippers help you twist the sections to get them apart.

Maintenance

This is sort of related to the stuck section problem.  I use my Jackite poles quite a bit and they can sometimes take a beating when camping or at the beach in a salty environment.  Dirt and debris might be contributing factors in getting sections stuck together.  Just a theory on my part.  I found that regular cleaning of the pole sections seems to minimize sticking problems.

Every other month or so (if I’m being diligent), I completely disassemble the poles.  Then, I spray a little WD-40 on a clean rag and wipe down each piece of tubing.  I wipe off any excess WD-40 with another clean rag and re-assemble the pole.  It seems to work for me.  After spending a week at the beach, this procedure is mandatory for me.

Bottom Cap Shock Absorber

When collapsing a 28-foot or 31-foot pole, the lower sections can sometimes come down so hard that they knock the bottom cap loose.  To counter this, you can cut a thin piece of sponge and place it inside the bottom cap.  I actually used two layers of that dollar store jar lid gripper material in mine.  Just make sure whatever you use doesn’t interfere with the threads in the cap.  This should help absorb some of the impact if you collapse the pole too quickly or if it comes down by itself in a strong wind.

This is two layers of material cut from the dollar store lid gripping pads placed inside the bottom cap of a Jackite 31-foot pole. The intent is to absorb some of the impact when collapsing the pole.

I hope some of this is useful to someone out there.

72, Craig WB3GCK

Jackite Pole Repairs

As you can tell from other posts, I’m a big fan of Jackite fiberglass poles.  My 31-foot pole sees heavy use as the main component of my Pop-up Vertical antenna. I also use it a variety of other portable situations, including my Bike Rack Vertical antenna.

Recently, I was in a wooded area and had the pole strapped to a signpost. While packing up to leave, the tip section got stuck.  It refused to slide back into the next larger section.  I noticed that the split ring I have attached to the top eyelet (see my Jackite Hacks post) had some damage. I’m guessing it got hung up in a tree branch when I was collapsing the pole.  My downward pulling most likely caused the top two sections to become jammed.

Damaged split ring. (Click for full-size image.)
Damaged split ring. A possible clue as to how two sections of my Jackite pole became hopelessly jammed.

I have had these two sections become stuck once or twice before.  I guess I’m sometimes a bit too aggressive when I extend the sections.  Usually, a little WD-40 does the trick.  Not this time.

I worked on it when I got home and wound up cracking the tip section.  The two sections were still stuck together.  After few minutes on the Jackite website, a new tip section and the next larger section were on order.  I received a shipping notice the next day. The cost was reasonable.  It was definitely less expensive than replacing the entire pole.  A couple of days later, the parts arrived and the pole is ready to head out into the field again.

Thanks to the good folks at Jackite, I’m back in business.  I’ll try to be more careful next time.

72, Craig WB3GCK

Disclaimer:  I have no interests, financial or otherwise, in Jackite.  I’m just a happy customer.

Jackite Pole Hacks

I’m a big fan of the Jackite fiberglass poles for portable antenna supports. I have two of them have have seen a lot of use over the years. Here are a couple of quick and simple hacks that improve (in my opinion) on an already great product.

Keeping the Cap From Falling Off

While the overall quality of Jackite’s products is excellent, there is one thing that I find annoying — the caps have a tendency to fall off when transporting the pole. To overcome this, I attached a velcro strap to the cap (Figure 1). The Velcro is something I had on hand in my junkbox. It’s about 8 inches long by 1 inch wide. I used a #4 machine screw with some flat washers, a lock washer and a nut (Figure 2). I used an awl and a small phillips screw driver to make the hole in the cap. I then attached two Velcro strips (the fuzzy part) on either side of the pole (Figure 3). When transporting the pole, just secure the Velcro straps (Figure 4) and you’re good-to-go.

Figure 1
Figure 1
Figure 2
Figure 2
Figure 3
Figure 3
Figure 4
Figure 4

Easy Extension

This quick mod might seem kinda pointless to some users. In fact, I hesitated about writing it up. Anyway, you be the judge:

Figure 5
Figure 5

In cases when I need to bungee or strap the pole to a fixed support, I would first need to extend the top-most section first. This is because the top section sits down inside the other sections when collapsed. What I did was attach a key ring (aka split ring) to the eyelet on the top section (Figure 5). The ring I used is approximately 7/8-inch in diameter. So, I can strap the collapsed pole to a support, remove the cap, reach in and use the ring to pull the top section out (Figure 6).

Figure 6
Figure 6

Again, you might not see the value in this one, but I find it helpful.

73, Craig WB3GCK

Guy Ring for a 31-ft Jackite Pole

Here’s a neat idea I “borrowed” from my QRP buddy, Ed Breneiser WA3WSJ. When I need my Jackite pole to be self-supporting and I don’t have to carry stuff very far, I usually opt for my Jackite ground mount stake. It’s quick and effective but too heavy to carry on a hike. Not to mention the need for a hammer (or large rock) to drive it into the ground. So, in situations where the ground mount is impractical, I use a set of guy lines to hold the pole up. Here’s a simple way that Ed came up with for securing the guy lines to a 31-foot Jackite pole.

It’s pretty simple to build one of these…

Pick up a 2-inch, Schedule 40, PVC end-cap at your local hardware store. You’ll also need some nylon line. I used some 1/8-inch braided nylon rope from my local Walmart store.

  • Drill a 1.75-inch hole in the top, using a hole saw attached to your drill. When slid over the Jackite pole, the guy ring should rest on top of the bottom (largest) section of the pole.
  • Drill three evenly spaced holes around the outside of the end cap. Use a drill size just large enough to accept the size of line you are using.
  • Drill a second hole about 0.5 inch to the left of each of the three original holes. So, you should wind up with 3 pairs of holes around the end cap.
  • Cut three pieces of line. I made each of mine about 9 feet long.
    Thread the line through the end cap holes, as shown in the pictures, and secure the end with a knot.
  • For the other end of each line, I tied a taut line hitch. This allows you to adjust the tension on each guy line.
PVC end-cap drilled out

My completed guying kit consists of the guy ring with the lines attached and four small plastic tent stakes. Everything fits nicely in a zip-lock bag. (I sometimes throw a lightweight, plastic mallet/stake puller in my backpack to drive in the stakes.) To use it, I drive in one of the tent stakes where the pole will go and three equally spaced tent stakes around it. Put these three tent stakes about 5 or 6 feet away from the center stake. Take the bottom cap off of your pole and place the pole over the center tent stake. The center tent stake should prevent the bottom of the pole from kicking out. Attach the guy lines to the three outer tent stakes and adjust the taut line hitches for the proper tension. That’s all there is to it.

Attaching the guy lines
Completed guy ring
Completed guy ring

I also built one of these for my 28-foot Jackite pole. For this pole, I used a 1.5-inch end cap. I used a 1.5-inch hole saw to make the large hole. The hole was a bit too small, so I did some filing on it to get the proper fit. The final hole size is approximately 1.6 inches. Again, the guy ring should rest on top of the bottom section. Everything else is the same as for the 31-foot pole.

Thanks again to WA3WSJ for sharing this idea with me.

73, Craig WB3GCK