
[This is an updated description of the drive-on antenna support that I have been using for many years. This version originally appeared in the July 2016 edition of QRP Quarterly in the “Idea Exchange” column and most-recently in the October 2024 edition of Radio ZS, The Journal of the South African Radio League. You can still find the older article here. A revised, “step-by-step” version appeared in ARRL’s On the Air Magazine (May/June 2024 edition). ]
Here’s a simple, inexpensive drive-on mast support that I have been using for more than ten years now. It’s been particularly handy for quick trips to the field, such as National Parks on the Air (NPOTA) activations.
Over the years, telescopic fiberglass poles have become popular as portable supports for lightweight antennas. Two popular suppliers of these collapsible poles are Jackite (http://www.jackite.com/) and SOTABeams (http://www.sotabeams.co.uk/). I typically use my 31-foot Jackite pole to support a vertical wire along the outside of the pole. I have also used them to support lightweight dipoles and a variety of end-fed wire antennas.
One trip to your local hardware store will get you everything you need for this project. To support a 31-foot Jackite pole, here’s what you’ll want to buy:
- 1-1/4 inch floor flange
- 18-inch length of 1-1/4 inch threaded steel pipe
- (4) 1/4-20 x 1-1/2-inch flathead bolts
- (4) 1/4-20 nuts
- (4) 1/4-inch flat washers
- (4) 1/4-inch lock washers
- 18 to 24-inch length of 1×8 lumber (I used a piece of maple. A piece of 1×6 lumber would also work)
[NOTE: I’ve heard that the dimensions of newer Jackite poles may be different. Use the dimensions given here as a general guide, and be sure to double-check the dimensions of your particular pole before buying materials.]
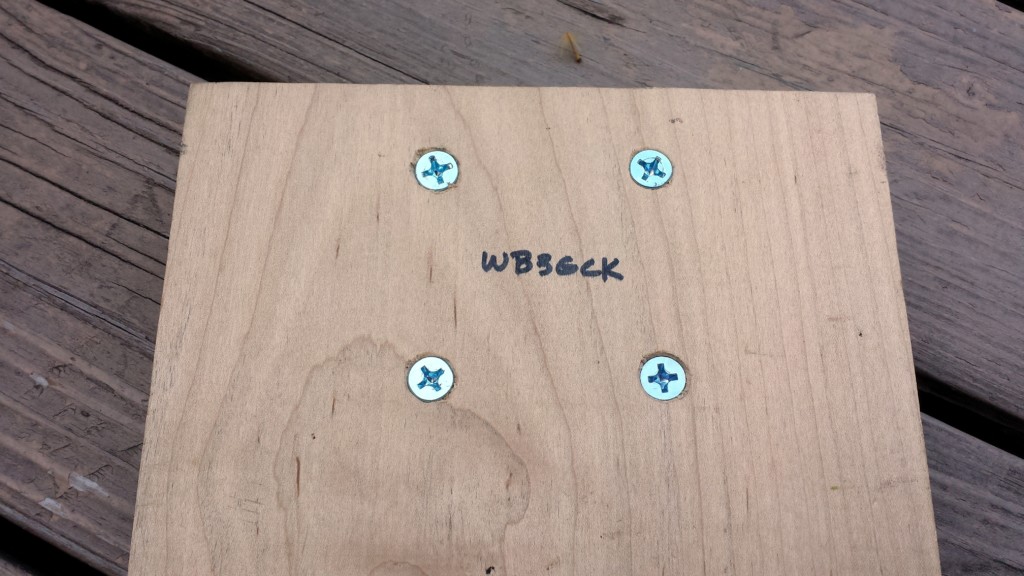
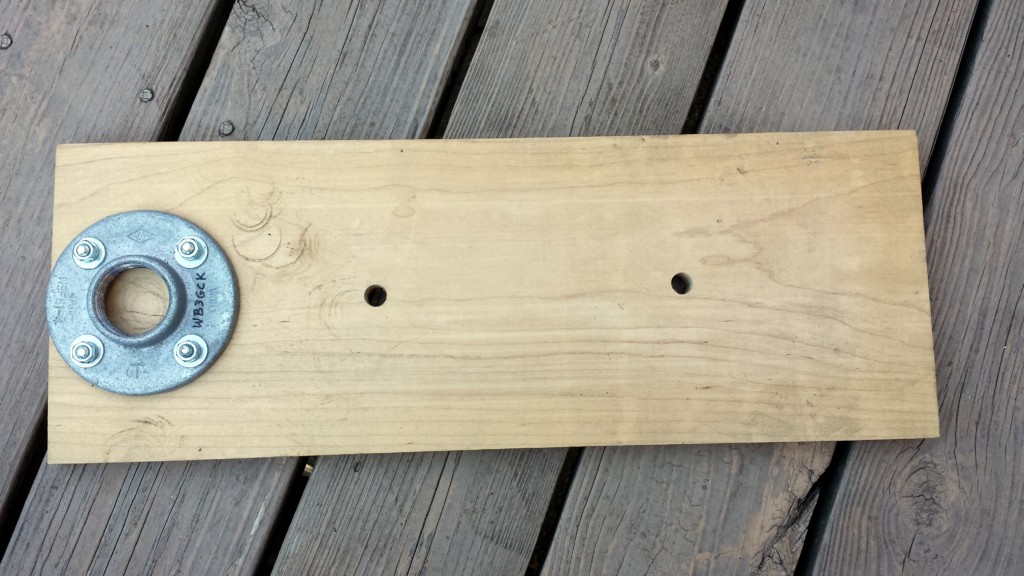
Assembly is pretty straightforward. Drill four holes to mount the flange to the board. The flathead bolts go in from the bottom. You need to countersink the bolts so they will flush with the bottom of the board. Attach the flange with the flat washers, lock washers and nuts. That’s about it.
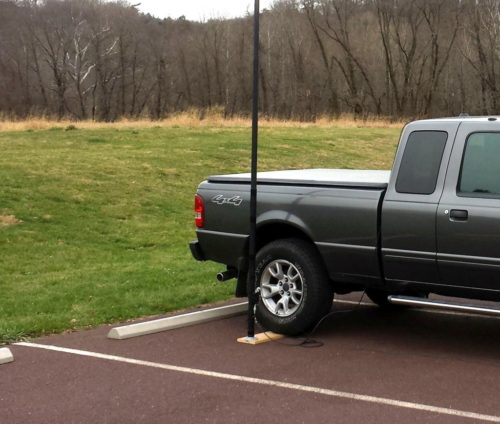
To use the mount, I just set it on the ground and run one of my vehicle’s tires up on it. Next, I screw the threaded pipe into the flange. Once the pole is fully extended and the bottom cap removed, I just slide the pole over the pipe. For my 31-foot Jackite pole, I use a little electrical tape on the pipe to give a snug fit.

You can also adapt this for other size poles. For my 28-foot Jackite pole, for example, I use a 1-inch pipe. For my 20-foot Black Widow pole (https://www.bnmpoles.com/), I use a 3/4-inch pipe. You can buy reducers (adapters) in the plumbing department that will allow you to use the smaller diameter pipes with the 1-1/4 inch flange. If you only use one particular pole, you can always buy a smaller flange and build your mount with that.
This design is more than sufficient for a lightweight, telescopic fiberglass mast. If you need to support something heavier, like a steel mast, you’ll need a more robust support than this.
DE WB3GCK

Great idea, simple and effective.
LikeLiked by 1 person
I use a similar technique to keep my paddles in place on my desk. My current paddles (BaMaKey TP-II) are mounted to one end of a 1/4″ x 4″ x 9″ piece of poplar that has had all its edges rounded over. Some rubber feet and a wax finish complete the setup. Instead of a giant hunk of brass, magnets, screws, tape, velcro, or glue, I simply rest my hand on the board while I use the paddles and they stay put. Easy peasy!
LikeLike