The (far) better half and I made a trip out to central Pennsylvania to attend some activities our grand-kids are taking part in. I had some time on Saturday morning for a quick activation, so I drove a few miles down the road to nearby PA State Game Lands (US-8941, KFF-5862).
We made the trip in the (far) better half’s little Chevy Traiblazer, so like a previous trip, I went with a simple setup. Along with my Penntek TR-35 (5W, CW), I used my Elecraft AX1 on a clip-on window mount. The diminutive AX1 has always gotten the job done in the past, so I hoped for similar results today.
My AX1 on the window mount
Today, I had a couple of things working against me: doing an early morning activation (0900 local time) on 20M coupled with some unsettled geomagnetic conditions. Not to mention running 5 watts into a 45-inch loaded whip. Still, I enjoy a challenge. Or maybe I’m just a glutton for punishment.
With the AX1, it only took a few minutes to get set up and get on the air. After spotting myself, it took nine minutes of CQing to make my first contact. Then, 19 minutes after that, I made contact number two. Yikes! It was looking like I was headed for my first busted activation with the AX1. I also began wishing I had brought my Gabil GRA-7350TC and mag mount, so I could have made some contacts down on 40M. Undeterred, I pressed on.
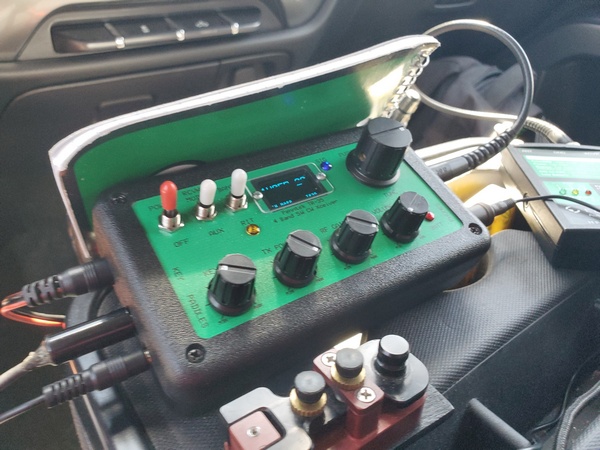
The crowded operating position in my (far) better half’s car
Not too long after that, things picked up a bit, and I started getting some more callers. Either the band conditions were improving or the hunters were waking up and getting out of bed. One of those callers was OH1MM. I had a weak copy on him, so I can only imagine what my QRP signal sounded like in Finland.
An hour after arriving onsite, I had 14 contacts, including one park-to-park and one DX contact. I was happy with that, so I packed up and headed back to my daughter’s house for a late breakfast.
So, despite getting off to a slow start, my little AX1’s undefeated streak remains intact.
It’s been a while since I’ve done a cheap speaker wire antenna, so here’s another one for you. Back in the early to mid-2000s, an antenna commonly referred to as the “No Counterpoise Antenna” was making the rounds on the Internet. I thought I might give it another look.
The No Counterpoise Antenna is either a 25-foot or 50-foot length of two conductor wire with half of one conductor removed. Essentially, it’s a radiator fed through a balanced line feeder. The 25-foot version is said to cover 20M through 10M, while the 50-foot version is supposed to cover 40M through 10M. It was usually connected to a balanced tuner of some sort or sometimes fed through a 4:1 balun. It was typically constructed from zip cord or speaker wire. So, this is perfect for another speaker wire project. (Actually, I built the 50-foot version years ago, but I don’t recall ever putting it on the air.)
A picture is worth a thousand words, so here goes:
I’ve seen this antenna sometimes referred to as a Zepp. A true Zepp is basically a half wave radiator with a quarter wave balanced line matching section. Unlike a true Zepp, the No Counterpoise Antenna is non-resonant, so I guess it’s actually “Zepp-ish.” Because it’s non-resonant, a tuner is required for this antenna.
I did some extensive research into the origins of this antenna. (OK… I just did a few Google searches.) Jeff Imel K9ESE came up with this design. I remember Jeff used to sell a high-quality version of the antenna on eBay. The reviews were generally positive.
Pete Millis, M3KXZ, is another name often associated with this antenna. I think that’s how I first came across it. Pete once made a phased array from two 25-foot versions.
In the August 2020 edition of Ozark QRP Banner, the Four State QRP Group’s newsletter, Terry Fletcher, WAØITP, had a nice write-up about it. He discusses his experience with both the 25- and 50-foot versions.
This antenna design has been around the block a time or two. So, there’s no innovation here on my part whatsoever.
Construction
I happened to have a 25-foot roll of #18 awg speaker wire on hand, so this time around, I opted to build…you guessed it… the 25-foot version.
Construction was about as easy as it gets:
I split the speaker wire halfway and cut off one side
Next, I twisted a loop at the end of the single wire and secured it with some Goop® adhesive. As an alternative, you could just tie a loop at the top or crimp a ring lug over the wire’s insulation.
I stripped and tinned the wires at the feedpoint and installed spade lugs. You can just strip and tin the wires, if you like.
To keep the speaker wire from splitting further, I put some heat shrink tubing a couple of inches up from the lugs. I also added a dab of Goop® in the middle of the antenna where one side of the wire was removed. All of this is completely optional.
Construction probably took me all of 15 minutes or so. That doesn’t include allowing the adhesive to cure overnight. However, the antenna was certainly usable without the adhesive and heat-shrink tubing I used. I’m just prone to overkill.
On the Air
To test the No Counterpoise Antenna, I drove down to Ridley Creek State Park (US-1414, KFF-1414). Using my drive-on mount, I supported the antenna from a 28-ft Jackite pole. I used a homebrew 4:1 unun at the feedpoint and ran 15 feet of coax into the cab of my truck to my KX3 (5 watts, CW). I used the long side of the antenna as the radiator.
I used my roll-on mount to support a 28-ft Jackite pole
Before I got started, I checked to see how the tuner in the KX3 would handle the antenna. The KX3 easily found a 1:1 match on all bands from 40M through 10M. Just for the heck of it, I tried 60M and 80M. The KX3 was able to find a good match on those bands, too. (That’s not too surprising, given that I once forgot to attach my coax to an antenna, and the KX3 still found a match.) I doubt this antenna would work well on 60M and 80M—but stranger things have happened. I wasn’t able to try it, but I’m sure the KX3 would be able to match it directly connected to the radio without the 4:1 and coax.
I used a 4:1 unun at the feedpoint
Band conditions weren’t very good, so this wasn’t an ideal test. Despite the mediocre band conditions, I logged 13 contacts during my short activation. Most of my contacts were on 40M. There was considerable fading on 30M and 20M, but I made a contact on each of those bands.
This was hardly a rigorous evaluation, but the 25-foot No Counterpoise Antenna got the job done. I need to give it another try, when conditions are better.
Anyway, if you have some speaker wire and a few minutes to spare, give this one a try and see what you think.
I had a chance to use the inexpensive whip I bought through AliExpress recently. While it performed well enough, I encountered a couple of minor quality issues. That’s certainly not surprising, given its $18 USD price tag.
Extending the whip, I noticed that two of the sections were pretty tight and took some effort to pull them out. Better tight than loose, I guess. Another issue is that the crimp that holds the mounting stud in the bottom section of the antenna was a little loose. When the antenna was fully seated in the mount, I could still rotate the antenna.
My $18 (USD) whip from AliExpress mounted on my homebrew loading coil
Because this whip is longer than a quarter wave on 20M, I didn’t extend the first section from the bottom. Using an antenna analyzer, I was seeing SWR readings similar to my MFJ-1979 whip. The SWR readings seemed stable. So, I guess the suspect crimp is making a good enough connection.
Band conditions seemed so-so this morning. Despite that, I logged 25 contacts on 40M and 20M in an hour, including three park-to-park contacts. I didn’t work any DX stations today, but I worked a station on the west coast in Washington on 20M.
Even with its issues, the whip did a pretty decent job this morning. It won’t replace my MFJ whip, but it will have a place in my antenna arsenal.
A while back, I ordered a 5.6M/18.4 foot. telescopic whip from a seller on AliExpress. I didn’t really need it, but having seen them on the Interwebs, I was curious to see what you get for $18 USD. Heck, at that price, why not take a chance?
You can find these whips all over AliExpress. (I have also seen them on Amazon for about $10 more.) One nice thing about them is they are 7.5 inches shorter than an MFJ-1979 when fully collapsed. So, it might fit in backpacks easier. The shorter collapsed length is due to having 14 telescoping sections compared to the MFJ-1979’s 10 sections. Because of its thinner metal and lack of a reinforced base, the AliExpress whip weighs 4.4 ounces/125g less than the MFJ whip. Of course, the other obvious advantage is the incredibly low cost.
There are some downsides though. The threads are metric (10mm), so you need an adapter to use it with a ⅜-24 mount. Fortunately, adapters are readily available as well. The other downside that I’ve noticed is that the metal they are made of is pretty thin. (More on that in a bit) The MFJ whip has a heavy stainless steel reinforcement at the bottom, while the AliExpress whip does not.
My antenna arrived from China about a week and a half later. It came wrapped in several layers of bubble wrap with a tough plastic outer wrap. I eagerly opened the package, but I was disappointed to see that the bottom section was damaged. It looked like either someone dropped something heavy on it or Big Foot stepped on it. As I mentioned previously, the metal is pretty thin.
While traveling half-way around the globe, this telescopic whip antenna encountered some rough handling.
When I finished uttering every expletive in my vocabulary, I contacted the seller through the AliExpress app and sent pictures of the damage. They promptly shipped out another antenna, and they didn’t want the old one back. So, I set the wounded whip aside, while I awaited its replacement.
The replacement whip arrived 6 days later, which is pretty impressive for a shipment from China. Happily, this shipment arrived intact. I would be remiss if I didn’t give props to the HUI BANG TE Store on AliExpress. Their customer support was top-notch.
When I get a chance, I’ll take the inexpensive whip out to a park to give it a go. I laid the AliExpress whip next to the MFJ-1979, and it looks like collapsing one section from the bottom on the AliExpress whip makes it about the same length as the MFJ.
I also have some ideas on how to straighten and reinforce the damaged whip to make it usable. That might be a winter project.
I’ve had a lot of fun with my Elecraft AX1 antenna since I bought it six or seven years ago. I’ve activated several parks with it, and it has yet to let me down. Running five watts into a 45-inch whip shouldn’t really work, but somehow it does. While I don’t always use it as my primary antenna, I always take it along on outings as a backup.
I have used my AX1 in a variety of settings, e.g., picnic table portable, with a car window mount, clamped to the handlebars of my bike, etc. While perusing the Temu website, I stumbled upon a tactical-style MOLLE pouch capable of holding the AX1 and all the accessories I typically use for those configurations. The cost was a mere $8.00 (USD) for a pair of them. (The original offering is no longer available, but a search for “molle pouch” on Temu or AliExpress should find this pouch or something similar.)
AX1 Kit (front). I have two of these pouches, so I used a nylon zip tie label to tell them apart. AX1 Kit (Rear). The pouch is MOLLE-compatible.
It measures 6.3 in. (16cm) x 4.33 in. (11cm) x 2.1 in. (5.5cm). For as inexpensive as they are, the quality is pretty good. The material is durable, and the zipper works smoothly. Each pouch came with an American flag velcro patch. At these low prices, you often get what you pay for. This time, though, I think it was a pretty good deal.
Everything fits comfortably in the little pouch, but there isn’t much room to spare.
This is what I carry in my AX1 kit. Not shown is a 3-foot RG-316 coax cable. (See text for list)
I normally carry my AX1 pouch in my backpack. When I have too much other stuff in my pack, I can use the MOLLE straps to attach the pouch to the outside of the pack.
It’s nice having all of this stuff in one place. Now my little AX1 is always ready to go, however I plan to use it.
While still on my extended stay at my daughter’s house in central Pennsylvania, I wanted to do some casual operating. So, I set up in the backyard to make a few contacts.
Today, I decided to give my Gabil GRA-7350TC vertical some air time. It’s been a while since I’ve used it. I set it up using the Gabil GRA-ULT01 MK3 tripod. I had forgotten how well engineered the Gabil stuff is. Anyway, I used four 15-foot speaker wire radials spread out on the ground. For the coax, I used 20 feet of RG-174.
My Gabil GRA-7350TC vertical on the Gabil GRA-ULT01 MK3 tripod
I started out on 40M. Using an antenna analyzer, I got the SWR down as far as I could and let the KX3’s tuner do the rest. Taking a quick dial spin down the band, I didn’t hear much at all. Eventually, I came across WA2NYY activating a park in New York and called him. Despite the horrendous band conditions, he heard my 5-watt signal on the first call. Next, I heard an activator in North Carolina, but I had a rough copy. We still managed to complete the contact.
My KX3 and 6Ah LiFePO4 battery
I then moved up to 20M and found the same crappy conditions. Eventually, I found and worked two more POTA activators.
I checked the POTA spotting page and saw that there were a couple of European activators on 15M. I tuned up the antenna and did a quick check. Nothing but dead silence across the band.
It was at that point that I checked the band conditions online and saw that there was a severe geomagnetic storm in progress. It showed poor conditions on all the HF bands. That certainly explained the lousy band conditions.
Yikes! This explains the lousy band conditions today.
Not being a glutton for punishment, I shut down for the day. Still, I was thankful for the four contacts I made with five watts of CW into an eight-foot base-loaded whip during a severe geomagnetic storm.
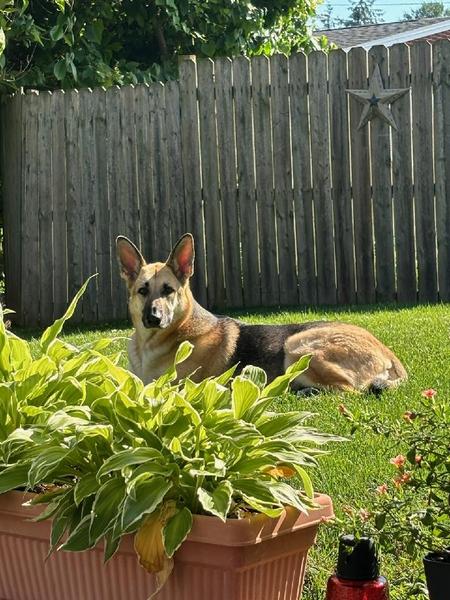
I’m currently out in the Harrisburg, Pennsylvania area for a week of house and puppy sitting for my daughter. My companion for the week is a five-year-old German Shepherd named Belle, who was adopted by my daughter and her family nine months ago. She’s a sweet dog, but she sometimes has some separation anxiety. So, I’m making sure my ham radio activities are short and close to home.
The first two days of my puppy sitting duty coincided with this year’s Field Day, so I did a little “backyard-portable” operating as category 1B. In my nearly 50 years of ham radio, this was my first-ever Field Day using my own callsign.
My plan was simply to set up an antenna in the backyard and make a few contacts each day. The weatherman was calling for dangerously hot temperatures over the weekend, but there’s a section of the yard that has some shade for most of the day.
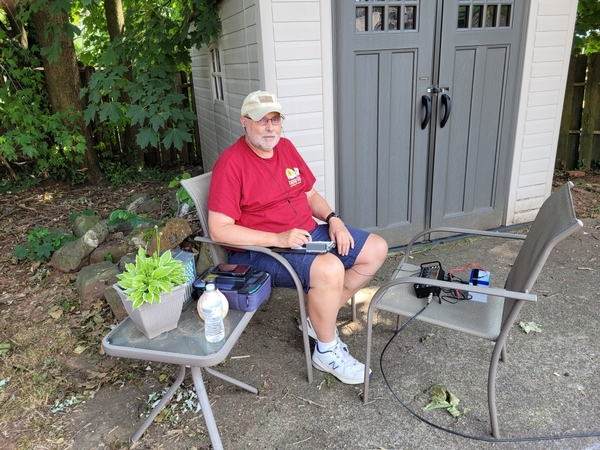
Yours truly operating backyard-portable (Photo by my (far) better half)
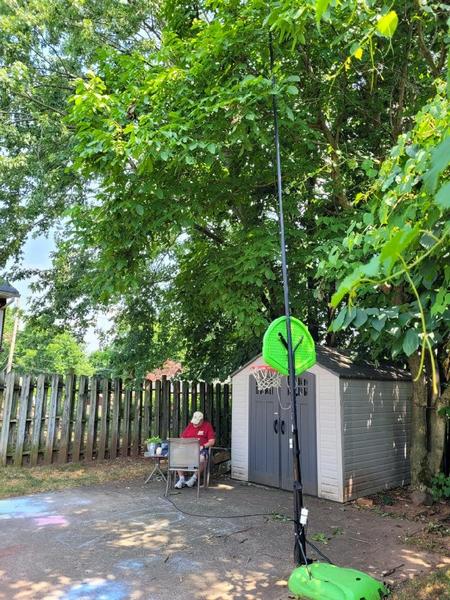
My (far) better half came out for the weekend. While I was surveying the backyard trying to determine what antenna to use, she suggested strapping “that fishing pole antenna” (aka Jackite pole) to my grandson’s basketball pole. Great idea! So, I strapped my 31-foot Jackite pole to the pole and used a 29-foot wire and my weather-resistant 9:1 UnUn. I ran 18-feet of RG-8x over to the two chairs that served as my makeshift operating position. My rig was an Elecraft KX3 (5 watts, CW) powered by a 6 Ah LiFePO4 battery.
My Jackite pole strapped to my grandson’s basketball pole. (Photo by my (far) better half)
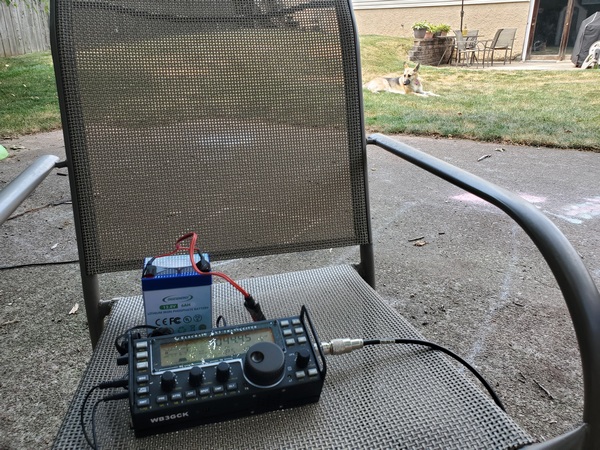
I started off logging contacts in HAMRS on my cell phone. That lasted for about two contacts before I switched to paper logging. I wanted to keep things simple and forgo using my laptop, so paper logging was just easier for me than using my cell phone.
My minimalist setup. I opted to keep things simple this year.
With temperatures in the high 90s (F), I only stayed out there for two brief sessions on Saturday. When a strong thunderstorm blew through, I called it a day.
My Field Day Security Officer
After breakfast Sunday morning, I went back out to make a few more contacts before the weather heated up again. When I called it quits, I had 62 CW contacts in the log, including one DX station (France).
My three hour effort didn’t break any records, but it was fun. I just wish the weather had been cooler, and I could have done without the thunderstorm.
Today I did something I don’t think I have done before: a single-band activation. Normally, I spend time on several bands. Today, however, I wanted to see how my 17-ft whip would perform mounted directly to the antenna mount on my truck (sans loading coil).
I drove down to Ridley Creek State Park (US-1414, KFF-1414) this morning and set up in one of the picnic areas. After mounting the antenna, I broke out my antenna analyzer. Since the fully extended whip is approximately a quarter-wave on 20M, I wasn’t surprised by the SWR readings. With 15 feet of RG-8X coax attached, the SWR was a flat 1.45 across the band. So I fired up my Penntek TR-35 (5 watts, CW) and hung out on 20M for the next hour.
My 17-foot whip mounted on my truck at Ridley Creek State Park (US-1414, KFF-1414)
When I checked the band conditions, I saw the geomagnetic field was “unsettled.” Solar wackiness notwithstanding, I logged my first 10 contacts in about 12 minutes. European signals weren’t very strong this morning, but I still managed three DX contacts: two from Italy and one from France. An hour’s effort produced 26 contacts, including four park-to-park contacts.
I’m planning to dust off a 25 year old 20M QRP rig and use it for a future activation. This antenna configuration might come into play for that. Stay tuned…
I went back to Marsh Creek State Park (US-1380, KFF-1380) for a quick activation this morning, and things got off to an interesting start. After setting up my trusty Penntek TR-35 (5 watts, CW) and 12-foot loaded whip, things just didn’t seem right. My SWR on 40M was high, and even my Elecraft T1 antenna tuner couldn’t get it lower than 3:1.
I started checking cables and connections, but everything looked OK. Heck, it’s not a very complicated antenna, so there isn’t much that can go wrong. When I got out of the truck to change to another antenna, I noticed my 12-foot whip looked a little shorter than usual. I took the whip off and immediately found the problem. In my haste to get set up this morning, I neglected to extend the top section of the telescoping whip. Doh! Once I pulled the top section out and re-installed the whip, all was right with the world again.
Using a notepad as an impromptu sun shield for my Penntek TR-35
Despite getting off to a slow start, my results weren’t too bad (by my standards). I finished with 36 contacts, including one known park-to-park contact. I had one DX contact with IW2NXI.
I finished my activation just in the nick of time. An hour after I got home, there was a major geomagnetic storm in progress. Timing is everything.
Back in December, Becky Schoenfeld W1BXY, Editorial Director for ARRL’s On the Air magazine, asked me if I would be interested in writing a detailed set of step-by-step instructions for my Drive-on Portable Antenna Support. Naturally, I said I would.
I submitted my manuscript, along with an all-new set of pictures. The article was published in the current issue (May/June 2024) of On the Air (pages 20-22).
If you’re interested, have a look. ARRL members have access On the Air as part of their membership.