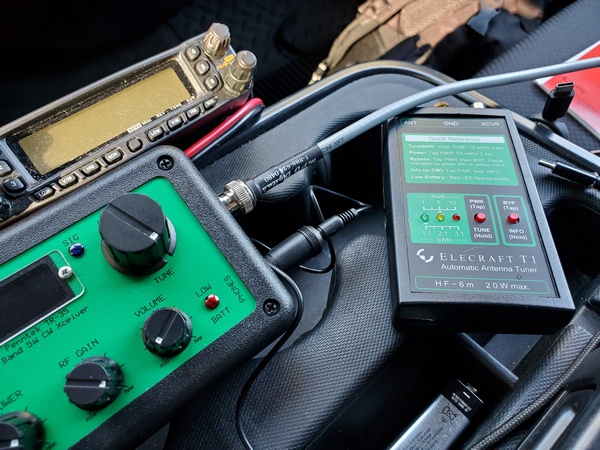
I’m almost too embarrassed to even post this, but it looks like I resolved my issues with my Elecraft T1 ATU. I think it might have been a monumental example of “cockpit error.”
This morning, a few hours after my last post went live, I sat down and went back through the T1 user manual. One line jumped out at me:
When bypassed, the T1 can still show SWR; activate TUNE mode, then key the transmitter.
Hmmm… So, that got me thinking. That would explain the behavior I have been seeing: indicating SWR while not trying to find a match.
I went downstairs to the shack to check the T1 again. When I entered the pushbutton sequence to enter the BYPASS mode, the T1 actually toggled into the “ATU Inline” mode. DOH! I connected the T1 up to my KX3 and rain gutter antenna, and it tuned up like a champ.
So, it looks like I might have accidentally put the T1 in BYPASS mode. Two errant presses of the push-buttons is all it would have taken. I’ll have to watch out for that, going forward.
Needless to say, I’m a happy boy again. Red-faced but happy.
Another busy weekend here in my neck of the woods. We had a family get-together in central Pennsylvania on Saturday, and I took part in a public service event with my local ARES-RACES group on Sunday. Despite everything going on, I squeezed in a short POTA/WWFF activation on Saturday morning before heading out of town.
I chose a spot in Valley Forge National Historical Park (US-0761, KFF-0761) that’s only a few miles from home. The parking lot serves as a trailhead for a popular trail, and it can be a busy place during the summer months. It wasn’t too bad today.
My original plan was to use some different gear and try out some antenna configurations. Being pressed for time, I went with my usual setup, which I knew—or thought—would work. That, of course, was my Penntek TR-35, Elecraft T1 tuner, and my 12-foot whip and homebrew loading coil combination. The SWR is a little higher on 40M and 30M, so I use the T1 to keep the rig happy.
I scanned the 40M band, and it was hopping. I planned to pick off some park-to-park QSOs before setting in on a frequency to call CQ. When I hit the T1, it didn’t even try to find a match, and the LEDs showed a 3:1 (or higher) SWR. I tried other bands, including ones I knew were close to 1:1, and the T1 wouldn’t budge.
I couldn’t remember the last time I changed the battery, so I put in a fresh one. No go. Next, I ran through the T1’s internal diagnostics. Nothing out of the ordinary there that I could see. On (very) rare occasions over its 11 years of service, the T1 would get fussy and refuse to match certain bands. Just running through the diagnostics seemed enough to clear up those issues—but not today.
I disconnected the T1 and went straight from the TR-35 to the antenna. The truck-mounted whip has very low SWR on 20M and 17M, so I confined my operation to those bands.
My ailing T1 after I disconnected it
Fortunately, 20M was in great shape for 0930 (local time), and I had a steady stream of hunters. I needed to leave at 1000 (local), and I had spent an inordinate amount of time playing around with the T1. However, my 30-minute activation netted me 26 contacts with two of them park-to-park. Most of the contacts were on 20M, but I had five on 17M before pulling the plug.
I drove back home, saddened that my trusty T1 was having issues. It has been so reliable over the years that I just took for granted that it would always work and match whatever antenna I was using.
Back at home, I did a couple of quick checks with different antennas, but no joy was to be had. I suspect a stuck relay, but I’m not really sure how to discern that from the internal diagnostics routine. I bought it assembled and tested, so I’ve never poked around inside. I’ll have to download the instructions for the kit version to see if that offers any insights.
When I get some time this week, I’ll pursue this further and decide how to proceed. If any T1 users out there have advice to offer, I’m all ears.
[Update: I resolved the issue with the T1. It appears to have been a case of “cockpit error.”Here’s what it was.]
I’ve been toying with the idea of putting together a small radio kit based on my (tr)SDX or something similar, so I’ve been looking at small paddles to go with it. Browsing through eBay recently, I came across several listings for the QU-21C paddles. They were inexpensive, so I thought I’d order them and give them a shot.
These paddles are nothing new; they’ve been around for a few years. (I’m definitely no early adopter.) The QU-21C paddles are made in China and mine are marked with the brand name, Magic Rabbit. From other reviews I have seen, there may be other manufacturers. So, the quality and packaging may vary. I paid about $24 USD from a seller (iDrone) that ships from the U.S., but you can find them listed for less than $20, if you don’t mind waiting for a shipment from China.
Opening the package, I found the paddles are even smaller than I expected. The base is approximately .98 inch by .98 inch (25mm x 25mm) and 1 inch (26mm) tall. The overall length, including the paddles, is 1.9 inches (48.5mm). On my kitchen scale, the paddles weighed in at 1.25 ounces (34 grams). The paddles appear to be 3-D printed, but the quality is pretty good. The base of the paddles is magnetic, which is one feature that first drew my attention.
Magic Rabbit QU-21C paddles with the rubber pad attached to the magnet. The pad looks a little ragged around the edges, because I applied it, removed it, and then decided to put it back on. I messed it up a little in the process.
The package I received included:
Paddles with a magnet attached to the bottom
3-ft cable with 3.5mm stereo plugs on each end
Hex wrench for adjusting contact spacing
Two adhesive metal discs
Adhesive rubber pad
Plastic storage case that holds everything
Some of the accessories that came with it. The cable is inside the clear plastic storage box. The adhesive discs can be applied anywhere, so you can use the attach the paddles magnetically.
My first impression was that the contact spacing seemed a little wider than I like. I used the supplied hex wrench and adjusted the spacing until the contacts were completely closed. Then, I backed off a little.
I prefer a light spring tension on my paddles, but the spring in these paddles seems stiffer than I’m used to. Unfortunately, there’s no adjustment for that. So, I’ll just have to get used to using a little more force than my other paddles.
I’m not sold on the magnetic base, though. The square magnet is fairly strong, but it’s highly polished. So, the paddles sometimes have a tendency to slide when I’m sending. I applied the rubber pad that comes with it, but that seemed to offer only minimal improvement. For now, I just hold them in one hand while sending with the other.
I’ve actually thought about trying to remove the magnet altogether, since it appears to be glued on. At least, it wouldn’t be attracting every ferrous object that comes near it. But, for now, I’m just thinking about it.
The QU-21C paddles during a recent activation, along with my trusty Palm Mini paddles.
I had a chance to use the QU-21C paddles on a recent park activation. It didn’t take long to get used to them, and I had no issues with them at all. The paddles keyed reliably, without missing a single dit or dah.
Even with my spring tension and magnet gripes, I’m pretty happy with these paddles. These cheap paddles look like worthy candidates for field use. We’ll see how well they hold up over time.
I was recently looking at some of my older gear gathering dust on the shelf, so I resolved to start putting it to use. So yesterday, before I headed out for Ridley Creek State Park (US-1414, KFF-1414), I grabbed my old homebrew z-match antenna tuner and gave my Elecraft T1 tuner the day off.
I built this tuner from scratch about 24 years ago, and it has always been one of my favorite projects. Based on a bunch of different designs, it gave me years of great service. For years, my go-to portable rig was my old FT-817 coupled with this tuner. Today, I paired the z-match with my Penntek TR-35 (5 watts, CW). I used my 12-foot whip and homebrew loading coil mounted on the truck. The loaded whip’s SWR on 40M and 30M is just slightly high, nothing the old z-match can’t handle.
My old homebrew z-match ATU along with my TR-35
I’ve been spoiled using automatic antenna tuners lately, but tuning the z-match was a cinch. Just peak the received noise, switch in the resistive SWR bridge, key up the rig, and tweak the knobs to extinguish the LED. Then switch out the bridge and go.
The z-match is a high-Q, narrow bandwidth device, so when changing frequencies on a band, I did a check with the SWR bridge before transmitting. It just took a minor tweak to extinquish the LED again.
It was a pretty good day on the bands. I split my time between 40M and 20M. I ended up with 28 QSOs. Among them was one park-to-park contact and one DX contact (IW2NXI). I forgot my water bottle, so my parched throat (and famously short attention span) prompted me to pull the plug after an hour on the air. Activation #20 from US-1414 was in the books.
My homebrew z-match was an integral part of my portable setups back in the day. In this picture from 2001, I was using it with a 40M doublet fed with TV twinlead.
My little Elecraft T1 tuner certainly has a size and weight advantage over my homebrew z-match. It’s certainly is easier to use, too. However the z-match can handle both balanced and unbalanced loads, and it doesn’t need a battery.
I have some other old gear in mind for future activations. A couple of rigs could make for some challenging activations.
I’ve had a lot of fun with my Elecraft AX1 antenna since I bought it six or seven years ago. I’ve activated several parks with it, and it has yet to let me down. Running five watts into a 45-inch whip shouldn’t really work, but somehow it does. While I don’t always use it as my primary antenna, I always take it along on outings as a backup.
I have used my AX1 in a variety of settings, e.g., picnic table portable, with a car window mount, clamped to the handlebars of my bike, etc. While perusing the Temu website, I stumbled upon a tactical-style MOLLE pouch capable of holding the AX1 and all the accessories I typically use for those configurations. The cost was a mere $8.00 (USD) for a pair of them. (The original offering is no longer available, but a search for “molle pouch” on Temu or AliExpress should find this pouch or something similar.)
AX1 Kit (front). I have two of these pouches, so I used a nylon zip tie label to tell them apart. AX1 Kit (Rear). The pouch is MOLLE-compatible.
It measures 6.3 in. (16cm) x 4.33 in. (11cm) x 2.1 in. (5.5cm). For as inexpensive as they are, the quality is pretty good. The material is durable, and the zipper works smoothly. Each pouch came with an American flag velcro patch. At these low prices, you often get what you pay for. This time, though, I think it was a pretty good deal.
Everything fits comfortably in the little pouch, but there isn’t much room to spare.
This is what I carry in my AX1 kit. Not shown is a 3-foot RG-316 coax cable. (See text for list)
I normally carry my AX1 pouch in my backpack. When I have too much other stuff in my pack, I can use the MOLLE straps to attach the pouch to the outside of the pack.
It’s nice having all of this stuff in one place. Now my little AX1 is always ready to go, however I plan to use it.
I recently spent some time in Central Pennsylvania at my daughter’s house. Since I was going to be there a while, I brought along my Raspberry Pi hotspot. While I’m not really active in digital voice modes (or any voice modes, for that matter), there are a couple of DMR nets I like to check into each week.
One issue I ran into in the past, is that my hotspot refuses to connect to their Wi-Fi network. Their Wi-Fi SSID has both an apostrophe and a space in it, so I’m guessing that’s the issue. I could have connected the hotspot directly to their router via an ethernet cable. Because of their router’s location, I would have had to move some furniture and put the hotspot in an awkward location. So, this time around I brought a little travel router to try another approach.
Back when I was working, I had a TP-Link Nano router that I took on business trips. Typically, I would connect it to an Ethernet port in my hotel room to create a personal Wi-Fi network for my laptop and phone. A while back, I upgraded to the newer (and faster) TP-Link TL-WR802N travel router. I don’t travel nearly as much these days, so the new router hasn’t seen much use.
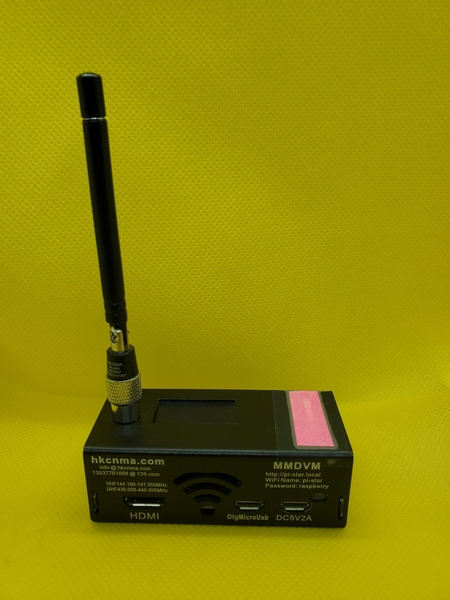
My little TP-Link travel router (right) and my beat up old MMDVM hotspot. The paper taped onto the hotspot is to tone down its excessively bright LEDs.
I brought the travel router along on this trip to create a wireless bridge from the house’s Wi-Fi to my personal Wi-Fi. The router’s Wi-Fi network has an SSID that my hotspot likes. I haven’t used that mode much, so I had to resort to the user manual to refresh my memory on how to set this thing up.
Actually, it was pretty easy to set up. It was simply a matter of connecting my laptop to travel travel router’s Wi-Fi to access the admin functions. From there, I set it up in the “Hotspot Router” mode. Then, I scanned to find the house’s Wi-Fi network and logged into it.
Testing the internet connectivity with my laptop, the speed looked good. I had previously added my travel router’s SSID and password to the hotspot, so soon after powering up I was hearing the sounds of DMR coming from my HT. This configuration worked great, and I successfully checked into a few nets during the week.
The next time I go out there to visit, I’ll just need to power up the router and the hotspot, and everything should work. (Knock on wood)
No ground-breaking technological advances here. I just love when a plan comes together.
73, Craig WB3GCK
[Disclaimer: I have no monetary interest in this product, and there are no affiliate links in this post.I’m just a satisfied owner.]
I was first bitten by the parks bug, taking part in ARRL’s National Parks on the Air (NPOTA) program in 2016. When NPOTA ended, I started activating parks under the World Wide Flora & Fauna (WWFF) program. When Parks on the Air (POTA) came along, I started submitting my logs to both programs—and still do.
Since POTA and WWFF are separately administered, there are some significant differences between the two programs. One notable difference involves the park designators. In some cases the park numbers are the same, but often they’re different. For example, the designator for PA 246 State Game Land is KFF-5862 in WWFF and US-8941 in POTA. Sometimes a park will be in one program but not the other.
Fortunately, Al Zelna N3KAE has provided an online tool that makes it easy for “dual activators” to cross-reference the WWFF and POTA park designators in the U.S. and Canada. Visit the CQ Parks.net website to check it out.
If you aren’t familiar with WWFF, it’s the original Amateur Radio parks program. In its current form, WWFF dates back to 2012, but it has roots going back to about 2008. While POTA has seen tremendous growth since its inception, WWFF is still very popular in Europe and other parts of the world. When band conditions are good, a spot on the WWFF site or a DX cluster will often generate a European pile-up. It sure is fun having a bunch of DX stations chasing my little QRP station.
Back in 2020, I started fooling around with digital voice modes. I don’t really use them a lot, but there are a couple of DMR nets I like to check into each week. I recently started using the WPSD software instead of the Pi-Star software I had been using on my two hotspots. Just for the heck of it, I wanted to try upgrading the old Raspberry Pi Zero board on one of them to something more capable.
According to the documentation, WPSD was never written for single core processors, like the old Pi Zero W board in my hotspot. The developer recommends a Pi Zero 2 W or better. While it will work on a single core Pi, it runs slower—I can attest to that. I also noticed that CPU utilization was well over 100% at times. With its quad core processor, the Raspberry Pi Zero 2 W is supposed to be five times faster than its single core predecessor. So, I was hoping to see some general performance improvements and faster boot-ups after this upgrade.
In the interest of full disclosure, I’m no Raspberry Pi expert—far from it. I had to do some online research before launching into this. The Pi Zero 2 W board is a drop-in replacement for the original Pi Zero board, so it seemed simple enough.
I bought a Pi Zero 2 W board on Amazon for about $28 (US). The board didn’t have the header pins installed, so I bought some. I bought a box of 40-pin headers for less than $10 (US). I now have more of them than I’ll use in my lifetime.
I took advantage of a rainy Sunday to do the upgrade. First, I needed to install headers on each end of the Raspberry Pi’s GPIO area. The two headers had two rows of five pins each. With the help of an Xacto knife, I snapped the pieces I needed from one of the (many) 40-pin headers I now own. With my aging eyes, I needed to use a lighted magnifying glass to do the soldering. To avoid melting the plastic, I allowed some cooling time after I soldered each pin.
The new Pi Zero 2 W board installed in the hotspot case. The two headers I soldered in are towards the front.
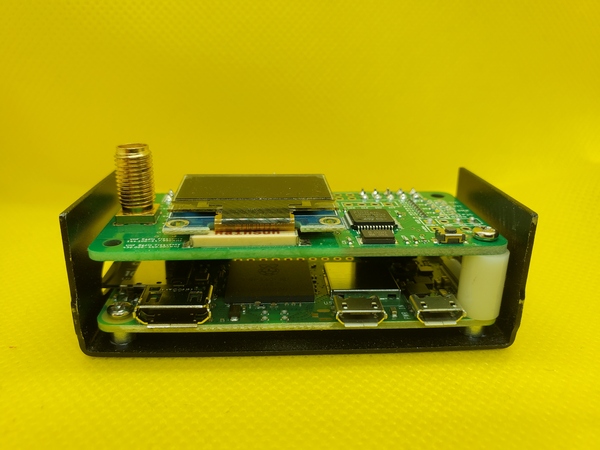
The MMDVM board installed on top of the Raspberry Pi board.
The is the fully-assembled hotspot. This pink section to the right is a piece of paper I used to cover some overly-bright LEDs.
From there, it was a simple task to disassemble the hotspot, swap boards, and put it back together. I estimate that the hardware part of the upgrade took all of about 20 minutes.
I had previously burned the WPSD image on a new Micro SD card, so it was ready to go. When I inserted the card and powered up, the hotspot booted up in a minute or two. After importing a backup WPSD configuration file and doing a couple of tweaks, the hotspot came to life. Success!
The performance improvements were immediately obvious. The dashboard and configuration web pages were much more responsive, and the CPU load typically stays under 20%. It’s been running for a week now, and it’s been rock-solid. Since this upgrade went so smoothly, I went ahead and upgraded my other hotspot. That one was just as easy and is also working great.
For you Raspberry Pi power users out there, this is pretty trivial stuff. Yeah, I guess it is. But it was an easy and fun little project, and I learned a bit about Raspberry Pi boards in the process.
Sometimes I get excited over some of the most trivial things. This is one of those times.
I wrote about my Junk Box Loading Coil in a recent post. I normally keep the loading coil and my 12-foot telescopic whip antenna stashed away under the backseat of my pickup truck, so it’s handy for spur-of-the-moment activations. I also keep a couple of Jackite poles and some other gear under there. While the coil is pretty rugged, I just didn’t feel right about cramming it in there unprotected. By pure dumb luck, however, I stumbled on the perfect storage solution.
While mindlessly browsing the Internet a while back, I stumbled across something on a Chinese seller’s website (Temu.com) that caught my eye. It was a storage case that was probably made for something no longer sold. I’d provide a link, but products quickly come and go on this website. The website listed it as “Simple Portable Storage Zipper Bag, Travel Electronic Tools Organizer, Zipper Container.” Wow. That’s a mouthful.
I had seen similar cases on eBay, but not in this particular size. Given the listed dimensions, I thought it might be a good fit for my homebrew loading coil. At the time I placed my order, it was selling for $7.98 USD.
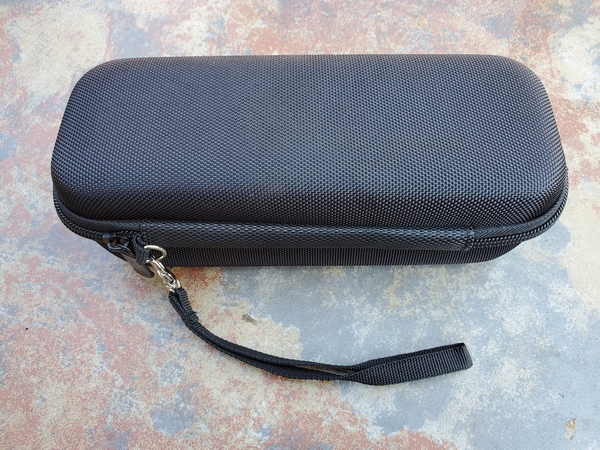
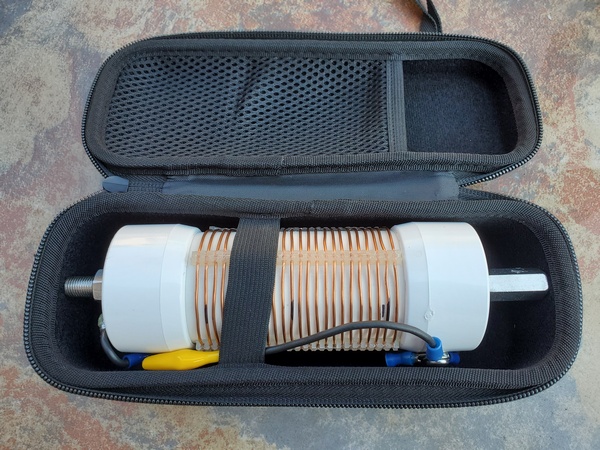
This is the case I bought to use with my Junk Box Loading Coil.
The container, along with a few other things I ordered, arrived on my front porch eight days after I placed my order. Voila! The case was a perfect fit for my loading coil. In fact, it looks like it was custom made for it. It’s semi-rigid, so it affords some degree of protection. It’s definitely not elephant-proof, though. There’s an elastic strap inside that helps hold everything in place.
My Junk Box Loading Coil tucked away in its new storage container
I’m not exactly sure what this case was intended to house, but it’s perfect for my application. So now, my coil will stay clean and protected, while waiting under the backseat of my truck for my next POTA activation.
I bought the Evolve III Maestro E-Book about nine months ago. Having used it for various ham radio applications during that time, I thought I’d offer some updated thoughts on this inexpensive laptop.
Spoiler alert! There really isn’t anything I dislike about the Evolve III laptop. Sure, it’s not the speediest machine ever built, but it has stood up to every task I’ve thrown at. I regularly use it at home for Winlink, NBEMS, and VarAC. I’ve also used it for these modes in the field for ARES-RACES exercises.
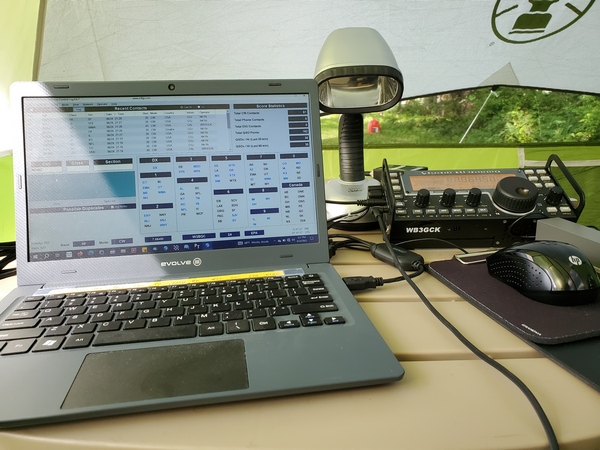
The Evolve e-book in use during this year’s Field Day
Power Considerations
Besides its small size and low cost, the thing I like best about the Evolve III is its battery life. Depending on what I’m doing, I can get eight to ten hours of run time. That’s way more than I need for my typical portable outings.
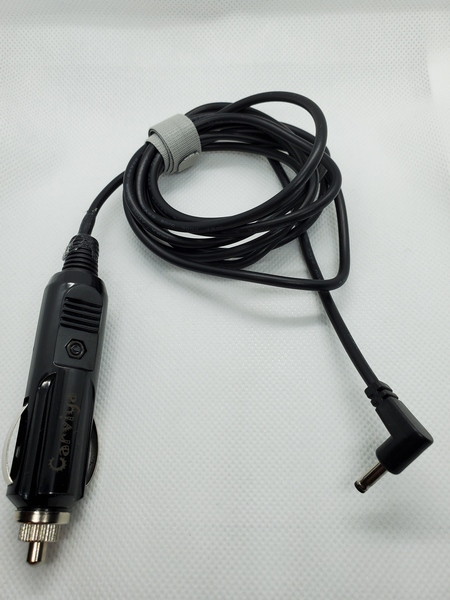
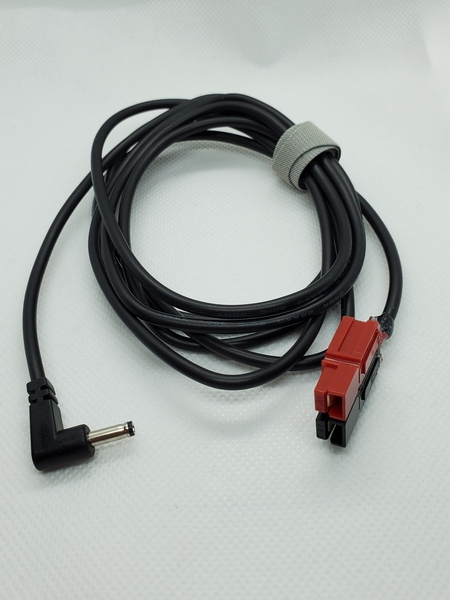
Since the “wall wart” charger it came with outputs 12VDC, I can charge the laptop from a 12V battery. For charging in the field, I bought a 6-foot cable on Amazon that has a 3.5mm x 1.35mm coaxial power connector on one end. On the other end, I added a 12V accessory plug (cigarette lighter type). I also built a second cable with an Anderson Powerpole connector.
A charging cable I built with a 12V cigarette lighter type plug
A 12V charging cable I built with a Powerpole connector
For Field Day, I operated all day without having to charge the laptop. I couldn’t have done that with other laptops I have used in the past. Before turning in for the night, I connected the Evolve to a 17 A-H gel cell battery to charge it overnight. (I had a fused 12V socket installed on the battery.) When I woke up during the night, it was fully charged, so I disconnected it. The Evolve lasted the rest of Field Day without further charging.
Field Day Configuration
My Field Day configuration made full use of the Evolve’s capabilities. I used it for logging, connecting to our shared log file via Wi-Fi. I also used one of the two USB connectors to drive my WKmini Morse interface to send CW with my KX3.
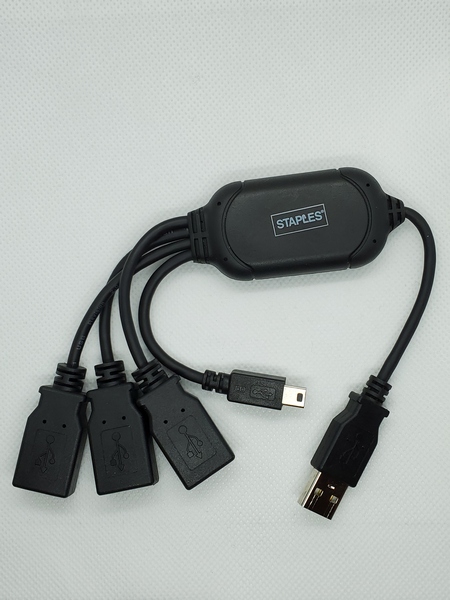
Since I only had one more USB connector available, I used a 3-way USB splitter to accommodate the other devices I needed to attach. I had the receiver for my wireless mouse attached to one port on the splitter and the KX3’s rig control cable connector to another port. I used the third port to connect a thumb drive, which I used for exchanging files with another Field Day participant.
This is a USB splitter I bought at Staples years ago. The extra USB ports came in handy during Field Day.
For backups, I had my N3FJP Field Day logger configured to save backup files to an SD card. Since my backup files included the entire networked log, I had everything I needed to submit our group’s entry on my laptop when I got home.
With all that going on, the Evolve performed flawlessly.
Some Additional Thoughts
I recently heard from a couple of hams who received Evolve laptops with a USB-C charging port. This is a recent design change, I suppose. I don’t have any hands-on experience here, but I think this might actually simplify things in the field. A 12V socket connected to the battery and a commercial 12V cell phone car charger should be all you need to charge the Evolve. Most cell phones and devices seem to favor the USB-C connectors these days, so suitable 12V car chargers are easy to come by.
So, if you couldn’t tell, I’m a big fan of the Evolve III Maestro E-Book. So far, I feel the $89 I paid for it was money well spent. I’m hoping I can get several more years of good service from it.