It had been a while since my last portable outing, so I was itching to get out today. The weather forecast, however, was calling for periods of heavy rain and gusting wind. Fortunately, I had a plan in mind to deal with the weather.
I made a quick trip up to nearby Evansburg State Park (K-1351, KFF-1351). It was rainy on the drive there, but tapered off by the time I reached the park. According to the weather radar app on my phone, another round of nasty weather was likely.
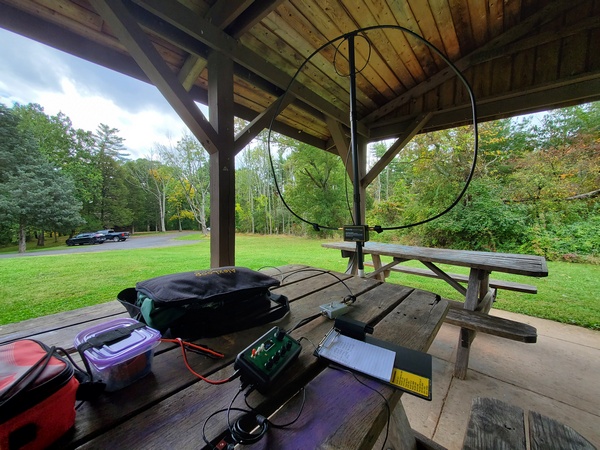
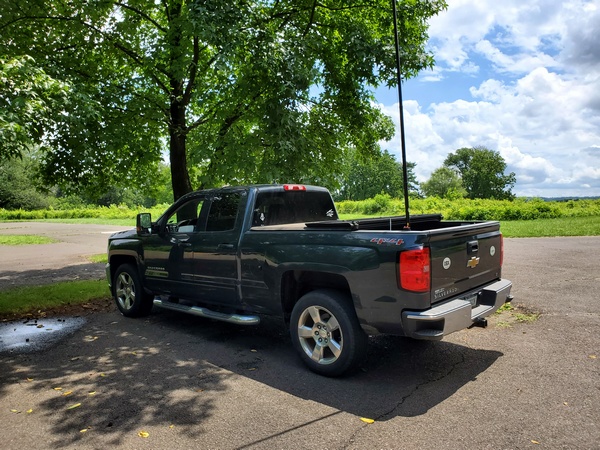
In order to use my usual truck-mounted antennas, I have to open up the tonneau cover. I had some things back there that I needed to keep dry, so I opted to set up under a large picnic pavilion. It’s no surprise that it was unoccupied. Who wants to hold a picnic on a rainy day in October, anyway?
My operating position under a pavilion at Evansburg State Park (K-1351, KFF-1351)
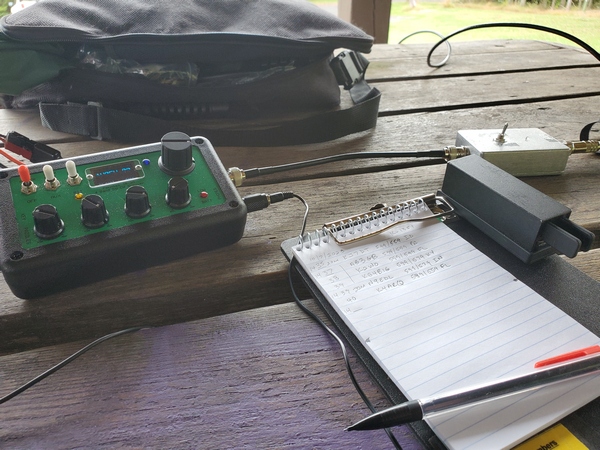
I pressed my Alexloop into service today, so I could keep my whole station under cover. Since my TR-35 doesn’t have an SWR indicator, I used a homebrew resistive SWR bridge. The resistive bridge is a little too sensitive on 40M and 30M, so I have to reduce the TR-35’s output power in order to see the null on the LED indicator.
My rig at Evansburg State Park (K-1351, KFF-1351). My homebrew resistive SWR bridge is the silver box to the right.
I started out on 20M, and things got off to a quick start. I logged seven contacts in the first few minutes. After that, it dried up. I picked up two more on 30M, but I was wondering if I was going to make it to 10 contacts before the next band of storms moved in.
I dropped down to 40M, and the activity picked up again. Even though it’s the least efficient band for the Alexloop, I always have good luck there. It was my most productive band today.
The rain wasn’t the big problem today; it was the wind gusts. I had to stop twice to pick up things that blew off the table. So, after just under an hour, I called it quits. I finished up with 21 contacts in the log. I had one park-to-park contact today (that I know of).
Despite the inclement weather, it wasn’t a bad day.
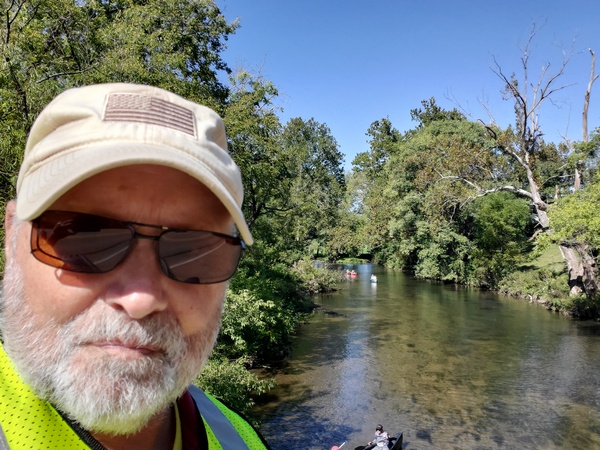
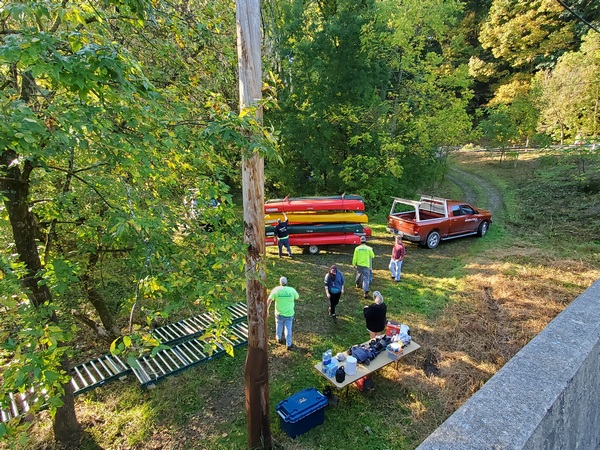
I was out yesterday with my local ARES-RACES group providing communications support for the Marshalton Triathlon, here in Chester County, Pennsylvania. This popular event combines cycling, canoeing, and fast walking. I always look forward to volunteering for this event each year.
Once again, I was at the end of the 2.3-mile canoeing segment, known as “Canoe Out.” This is my favorite assignment and one that I request each year. The folks working at this location help the participants out of their canoes and retrieve the canoes for transport back to the starting point. I was situated on a bridge with a superb view of the Brandywine River. Compared to the rainy weather we had last year, the weather this year was just about perfect for this time of year.
A selfie taken from my vantage point on the bridge during the Marshalton Triathlon
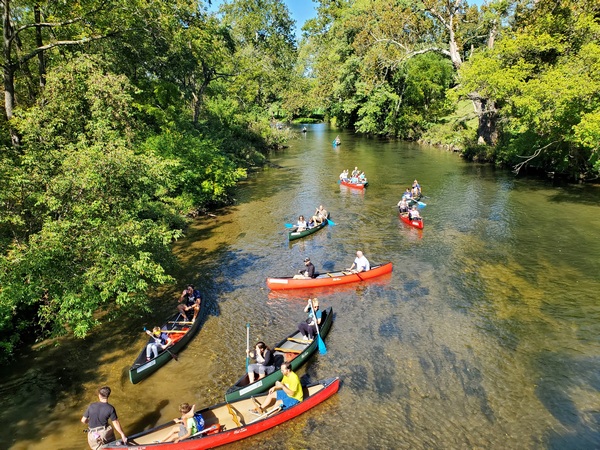
Canoeists waiting to exit their canoes
The boat handlers getting a load of canoes ready to go back upriver. They use a system of rollers to help move the canoes up from the river.
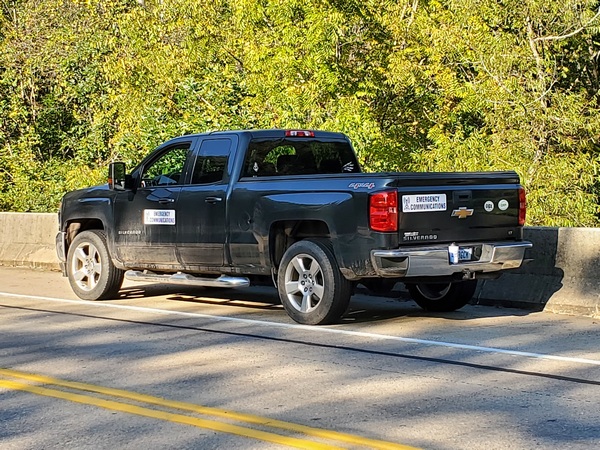
My truck parked on the bridge across the Brandywine River
From a communications standpoint, this event is pretty simple. An HT was the only equipment I needed. Most of my communications involved coordinating with the folks at the “Canoe In” location upriver, letting them know when a load of canoes was headed back to them.
I didn’t hear of any serious incidents on the course, so that’s good news. There was a report of an overturned canoe, but the participants were able to get back in their boat and continue downriver.
This is our group’s last public service event for the year. We’ll be back out on the Brandywine River in the Spring supporting the Northbrook Canoe Challenge.
Whenever I buy parts for a project, I always buy one or two extras. Over the years, I’ve amassed a sizable collection of random parts. Some of it will never be used, but sometimes my collection of parts has just what I need for something I want to build. I like when that happens.
A while back I wrote about an old homebrew coil I resurrected and paired with a 12-foot telescopic antenna. The coil, while effective, was built to use with a much shorter whip and is larger than what I need. I scoured my junk box and came up with most of the parts I needed to build a scaled-down version.
I should note that I built this coil specifically to use with my old MFJ-1956 12-foot telescopic whip. In this configuration, this coil covers 40M through 17M. So, if you have a different whip or want to cover different bands, you’ll need to modify the design accordingly.
Completed loading coil. Used with a 12-foot telescopic whip, it tunes from 40M through 17M.
I used the old coil as a guide to determine the number of turns I needed to cover the bands of interest, adding two turns for good measure. Using an online shortened vertical calculator, I figured I would need about 13.4μH to load the 12-foot whip on the 40M band. Using an online coil inductance calculator, I estimated the total inductance of my coil to be 14.8μH. So, it covers 40M with a turn or two to spare.
The new coil assembly measures 8.25 inches end-to-end, making it 2.25 inches shorter than the old coil. While it’s about 3.3 ounces lighter than the old coil, this new coil still weighs in at a hefty 10.8 ounces.
Parts List
With a few exceptions, my junk box provided the parts I needed to build the coil.
5-3/8 inches of 1.5 inch PVC pipe
(2) PVC end caps for 1.5 inch PVC pipe
(4) pieces of nylon grommet edging, 3.25 inches each. (The material I used has about 8 notches per inch)
16 gauge bare copper wire, approx. 12.5 feet
(1) 3/8-24 coupling nut, 1-1/8 inches long
(1) 3/8-24 x 1-1/4 inch stainless steel bolt (bottom mounting stud)
(1) 3/8-24 x 1 inch stainless steel bolt (top bolt)
3/8 inch flat washers & lock washers
(2) #10 x 3/4-inch self-tapping screws
Approx. 6 inches of RG-174 coax
Small alligator clip
Misc: ring lugs for ⅜-inch & #10 screws
Construction Notes
As shown in the accompanying photo, I drilled the end caps to accommodate the ⅜-24 bolts. The 1-1/4 inch bolt was used for the bottom of the coil, along with a flat washer and a lock washer. The 1-inch bolt was used for the top, along with flat washer, lock washer, and the coupling nut.
This is the coil form with the four strips of grommet edging glued on. The ends were drilled to accommodate the 3/8-24 bolts.
The coupling nut was one item I didn’t have in my junk box. My local hardware store is well-stocked, but they didn’t have them with the ⅜-24 thread. I eventually found what I needed on Amazon. It was a little pricey, but I didn’t have any better options at the time.
After cutting the PVC pipe to length, I temporarily installed the end caps. Then, I cut four pieces of the grommet edging to length and glued them on, using Goop® adhesive. Unfortunately, I can’t provide a part number and source for the edging. A local QRPer, Ron Polityka WB3AAL (SK), gave me several pieces many years ago. I’m pretty sure Panduit was the manufacturer. My stash was nearly depleted, but I had enough left for this project.
Before assembling the end caps, I made two short jumpers, each with a ⅜-inch ring lug on one end, and a smaller ring lug on the other. Then I tightened everything up. I left about a ½ inch of thread on the top bolt to go into the coupling nut. I was careful to ensure that my whip antenna would fully thread into the coupling nut.
Before winding the bare wire on the coil form, I installed a ring lug on one end. I drilled a pilot hole in the side of the lower end cap and used a self-tapping screw as a connection point. When you wind the wire on the coil form, try to get the turns as tight as you can. (I didn’t do as good a job winding the coil as I would have liked.) Once I finished winding the coil, I cut the wire to length and installed a ring lug. I used some more Goop adhesive on the grommet edging to hold the turns in place.
The last step was to build the clip lead. For this, I used a piece of RG-174 coax. There’s nothing magical about the RG-174; stranded hookup wire would be fine. I used RG-174 primarily because of its flexibility, plus the shield would be a good RF conductor. (The center conductor was unused.) I crimped and soldered a ring lug to the braid on one end, and soldered an alligator clip to the braid on the other end. Then I used another self-tapping screw on the top end cap to connect everything together.
On the Air
I wrote about my initial tests of the coil in a previous post. Using an antenna analyzer, I determined where to place the tap for each of the four bands. I then used a permanent marker to mark these locations on the coil, so I can quickly change bands without resorting to the antenna analyzer.
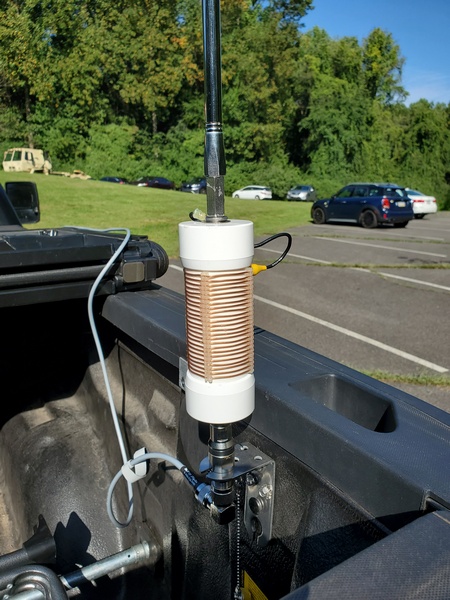
This is the completed loading coil installed on my truck for a POTA activation.
With the antenna mounted on my truck, the SWR is higher than I would like on 40M and 30M. This is not unlike other shortened, base-loaded verticals I’ve used in this configuration. An additional counterpoise wire or two might help. Also, grounding the bottom of the coil and feeding it a couple turns up from the bottom would provide a precise match on the lower bands. I’ve used that technique in the past. That configuration , however, is a bit more complicated to implement, given the way I plan to use this coil. So, I just use a tuner to keep the radio happy, and the antenna seems to work fine.
Wrap-up
My older, larger coil worked fine; so technically, this project was unnecessary. But, since I had most of the parts on hand, what the heck. It was a fun project, and I’m sure it will see a lot of use in the future.
I built a new loading coil to use with my MFJ-1956 12-foot telescopic whip. This is a scaled-down version of the old one I had been using. But, more on that in a separate post. Anyway, I was dying to see how it worked, so I drove down to Ridley Creek State Park (K-1414, KFF-1414) to put it on the air.
When I rolled into the parking lot, I was surprised to see a large military truck there. As I drove around the loop, I saw about a dozen soldiers in a field. Two of them were carrying a stretcher back into the woods. No, the park wasn’t under attack. It appeared to be some reservists going through a training exercise.
I deployed the new antenna configuration in a minute or two. Before I got on the air, I hooked up my antenna analyzer to confirm that I could tune it up on each band from 40M through 17M. Success! I used a Sharpie® pen to mark the coil tap locations for each band.
My new homebrew loading coil on its maiden deployment
My rig today was my trusty TR-35 (5 watts). I started out on 40M: and, after spotting myself, the calls started rolling in. I made the requisite 10 contacts in about eight minutes. After making 23 contacts on 40M, I moved up to 20M.
There was also lots of action on 20M. One caller was W6LEN in California. It’s been a while since I worked Jess, so it was good to hear him again. Jess spotted me for the WWFF folks, and I soon started receiving calls from DX stations. I logged contacts with Puerto Rico, Italy, France, and Poland.
After exactly an hour of operating, I had 42 contacts, with four park-to-park contacts I’m aware of. Throwing in the DX contacts, this was one of the better activations I’ve had lately.
I’m hesitant to attribute today’s success to my shortened, base-loaded whip; but this thing seems to have some kind of mojo. I’ll do a separate post on the coil and how I put it together.
I wanted to get out for at least one POTA activation during the Labor Day holiday weekend. Since we have another extended heatwave kicking off today, I opted to go out yesterday. I got an early start at French Creek State Park (K-1355, KFF-1355), figuring that the park would be busy—and it was.
I parked at a trailhead, well away from the busy boat launch and picnic areas. Using my TR-35 (5 watts) and homebrew vertical, my first ten contacts came in about 15 minutes. Most of my contacts were on 40M, while 30M and 20M both yielded a few more.
My rig at French Creek State Park (K-1355, KFF-1355)
After an hour or so, the bands seemed to suddenly dry up; so I packed up. (After I got home, I saw that there was some geomagnetic activity in progress.) In any event, my log had 22 QSOs with four park-to-park contacts.
This activation put me one away from a “Repeat Offender” award for this park. I guess I’ll be back again soon to wrap that up.
I hope everyone has a happy and safe Labor Day holiday.
Yesterday was the annual running of New Jersey QRP Club’s Skeeter Hunt QRP contest. Even though I’m not much of a contester, I always look forward to this four-hour sprint.
This year, I was asked to be one of the bonus “Palindrome Skeeters.” These are participants with skeeter numbers that read the same, forwards and backwards. My assigned skeeter number this year was 66.
For this year’s contest, I operated from a piece of property owned by my daughter and her husband. I set up in a field on top of a hill, a place I’ve used many times in recent years. Since I had plenty of room, I planned to get up there early to set up some sort of long wire antenna. That didn’t quite work out. I got there later than planned, so I just set up my trusty homebrew vertical on the back of my truck. That’s always a quick way to get on the air.
My setup for the 2023 Skeeter Hunt
I spent most of my operating time on 40M, alternating between calling CQ and searching/pouncing. Although most signals weren’t very strong, there were lots of them. Every time I thought I had run out of skeeters to work on 40M, I’d find another one buzzing out there. I eventually moved up to 20M, where the signals seemed much stronger. Searching and pouncing, I added a few more skeeters to my log.
My KX3. The food container behind the radio houses a LiFePO4 battery.
The bugs were bad yesterday. I didn’t see any real skeeters, but I did encounter every other insect known to man. I even killed a tick that was taking a leisurely stroll across the table. When I eventually lost my shade, it was time to call it a day.
Yours truly wearing my official Skeeter Hunt attire
I operated for a little over two hours, which is longer than my attention span usually lasts. (Remember when I said I wasn’t much of a contester?) I ended up with 30 contacts, 28 of which were skeeters. Four of my skeeter contacts were with fellow palindrome skeeters. I also hunted a POTA station I came across in amongst the skeeters on 20M.
My 30 contacts won’t set any records, but it’s my best showing in recent years (or maybe ever). Once again, I have to give a shout out to Larry W2LJ for putting this fun contest together.
We made a trip to the Outer Banks of North Carolina this week for our annual family vacation. As in previous years, we rented a house on Currituck Sound. This time, however, we were just outside the village of Duck.
This was our first time renting this house, so I did a little prior research on the layout using pictures on the Realtor’s website and Google Earth. OK, I’ll be honest; I was looking for places to put my antenna. I had a couple of possibilities in mind, but I waited until we got there to decide where to set up.
My Set-up
It was brutally hot when we arrived on Sunday afternoon, August 13th; so I decided to forego putting up an antenna until the following morning. Instead, I surveyed the property to find a spot to set up the radio gear.
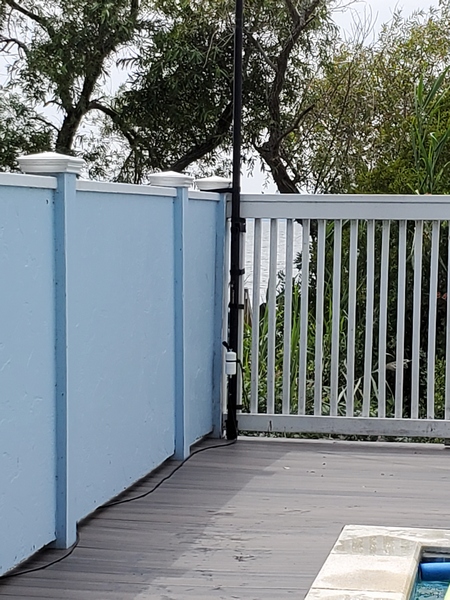
Later the next day, I strapped my 31-foot Jackite pole to a fence near the pole. The wind was pretty strong, so I used every velcro strap I had with me. Since these rental houses usually come with high noise levels, I kept the antenna about 40 feet from the house. I used the pole to support a 29.5-foot vertical wire, which was fed through my weather-resistant 9:1 unun. I had to use 50 feet of RG-8x to connect to the rig. That’s longer than I usually use, so I’m sure I was introducing increased coax losses. Life is full of trade-offs, I guess.
My 31-foot Jackite pole strapped to a fence about 40 feet away from the house
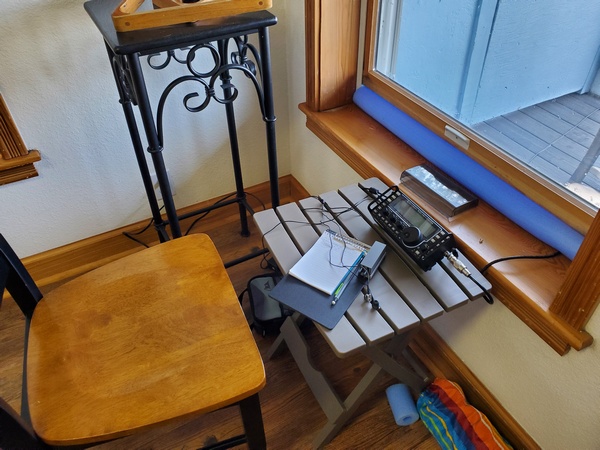
We were under an excessive heat warning for the first few days, so I kept my radio inside the building. I unclipped the bottom of the window screen enough to accommodate the coax. I cut a foam pool noodle to fit the width of the window. Then I made a lengthwise cut so I could fit it onto the window frame and seal the window a bit.
My operating position. A piece of foam “pool noodle” was used to seal the window where the coax enters.
After getting it all together, I did a quick test. The KX3’s tuner provided a good match on every band from 80M to 10M. I’m sure the coax losses were helping to make it easier to tune the antenna. There was a fair amount of noise on 40M and below, but the higher bands weren’t too bad.
Antenna feedpoint. My homebrew, weather-resistant 9:1 unun was used to feed a 29.5-foot vertical wire.
While I was on 30M, I heard a station in Arkansas calling CQ. Despite some deep fading and static from storms in the area; we managed to complete the QSO. The antenna, while nowhere near optimal, was functional. Satisfied with that, I declared victory and headed out to join the rest of the family in the pool.
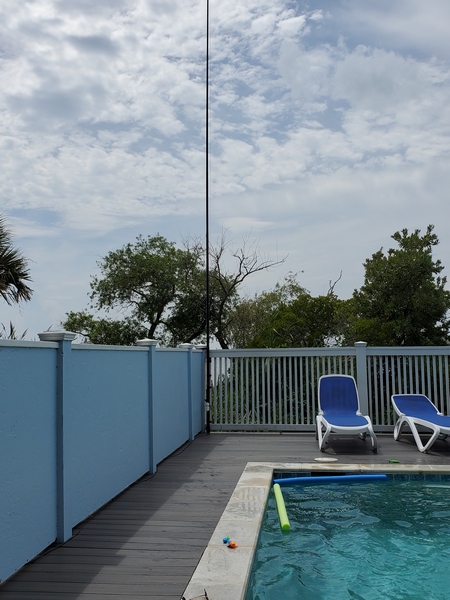
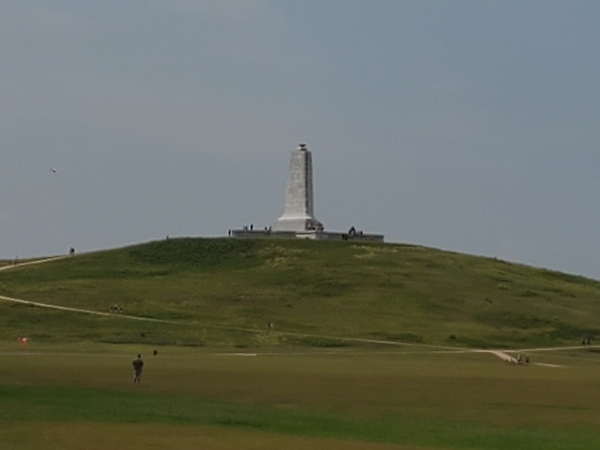
Wright Brothers Memorial (K-0797, KFF-0797
For the past several years, I thought about activating a park or two on the Outer Banks. For various reasons (mostly laziness), it hasn’t happened. I set out to change that this time around.
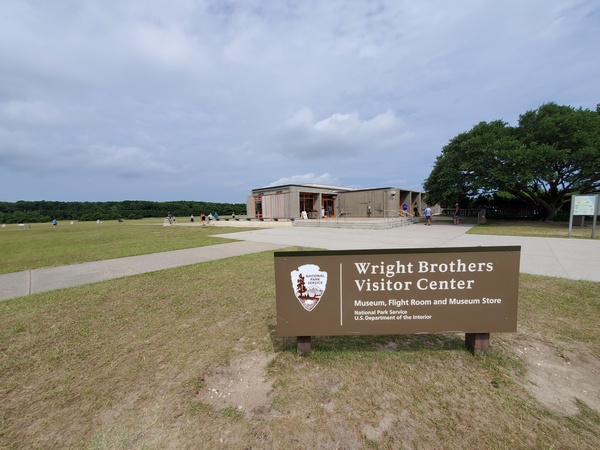
On Wednesday, I drove down to the Wright Brothers National Memorial (K-0797, KFF-0797), about 30 minutes away from where we were staying in Duck. I planned to go the day before, but I delayed it by a day, because of an excessive heat warning. There’s normally a fee to enter this park, but my Veterans ID card got me in for free.
Wright Brothers National Monument (POTA K-0797) Visitor Center
The Wright Brothers Monument
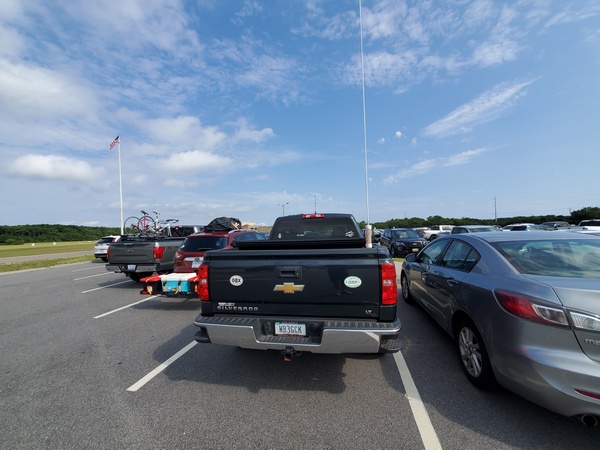
My parking spot at the Wright Brothers Monument (K-0797). There was no one around me when I started.
I operated from my truck in the main parking lot, using my TR-35 (five watts) and 12-foot loaded whip antenna. The bands were in great shape; I made my first ten contacts in ten minutes.
After about 50 minutes, it started getting hot and crowded; so I started packing up. This park is a very popular attraction; the empty parking lot I started in was now full. I ended up with 30 contacts in my log, including six park-to-park QSOs.
I had planned to activate a second park this week, but that didn’t work out. I’ll save that for next year.
Operating from the House
Besides the POTA activation, I made a handful of QSOs each day. The 30M and 20M bands, both having a low noise floor, were the most productive for me. These rental houses are chock full of light dimmers and other noise-producing amenities, so operating on the lower bands can be challenging.
Tuesday, August 15th, was the 30th anniversary of my first QRP portable operation. I wrote about that trip in a post from five years ago. It was fitting, I suppose, that I was portable this week.
Things also got a little dicey Tuesday evening. A storm blew in, and the high winds were bending my 31-foot Jackite pole further than I had ever seen. I hurried out and collapsed the pole before the heavy rain started. That pole has really taken a beating over the years, and this year was no different. The wind collapsed it a few times during the week.
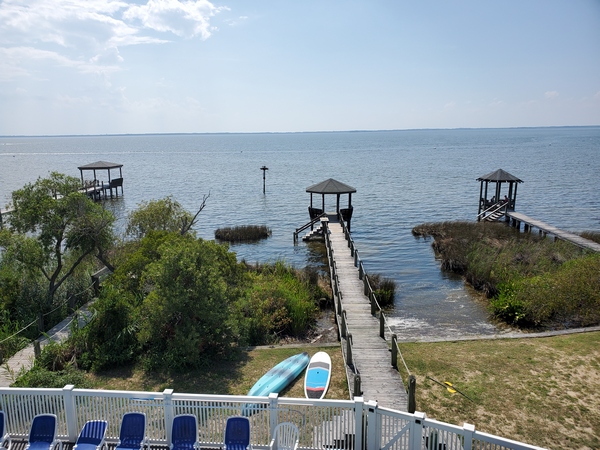
Our view of Currituck Sound from the 3rd story deck
One of my last QSOs for the week was with EC1R, who was activating a park in northern Spain. I had to crank up the KX3 to 15 watts to make it, but I managed to bust through the pile-up he had going.
After a few final QSOs on Saturday morning, it was time to take down the antenna and pack up the radio gear. Our annual family vacation always seems like the shortest week of the year. This year was no exception.
Looking through some files recently, I came across the sales invoice for my old Yaesu FT-817. According to the invoice, my FT-817 was 20 years-old back in May. The ‘817 hasn’t seen much use lately, so I set out to change that.
I first saw the FT-817 at an Atlanticon QRP convention back in 2001. The FT-817 had just come out, and I wanted one the moment I saw it. It wasn’t until two years later that I finally pulled the trigger and bought one. The FT-817 became my main rig for many years, both at home and in the field. After I bought my Elecraft KX3, the FT-817 was only saw infrequent use in the shack.
The early FT-817s were plagued with a tendency to blow the finals. Sadly, mine was no exception. Despite being very careful, my finals went belly-up during a camping trip in 2006. I sent my rig back to Yaesu for repairs, and they installed the newer, more robust finals used in the FT-817ND. It’s been fine ever since—knock on wood.
Initially, I used my homebrew Z-match tuner with the FT-817. In 2009, I bought the LDR Z-817 auto tuner, which was designed specifically for the FT-817. The Z-817 certainly made tuning up a lot faster.
A while back, I tried to program some new repeater frequencies using Chirp on my laptop. Windows informed me that the chip in my old FT-817 CAT cable is no longer supported. I bought a new cable on Amazon, and I was soon back in business.
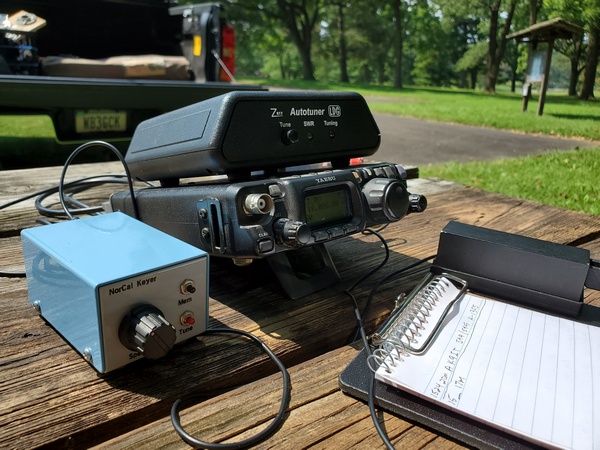
To prepare for today’s outing, I put fresh batteries in the Z-817. Since the FT-817 doesn’t have a memory keyer in it, I dug out my old NorCal Keyer. I built the NorCal Keyer from a kit not long after I purchased the FT-817, so it is also 20 years old. I gave the keyer a set of fresh batteries and programmed one of the three memories with a “CQ POTA” message.
With my trusty FT-817 in tow, I drove over the Valley Forge National Historical Park (K-0761, KFF-0761). I parked my truck in a spot that had a picnic table about 10 feet behind it. That allowed me to set up my homebrew 19-foot vertical on the truck and run an 18-ft length of RG-8x over to the rig.
My 20 year-old Yaesu FT-817 back in the field at Valley Forge National Historical Park (K-0761, KFF-0761). The blue box in the foreground is my NorCal Keyer, which I built from a kit 20 years ago.
Before starting my activation, I did some testing. The FT-817 and Z-817 combo played well with the vertical. I was able to easily get a good match from 40M through 10M. The earbuds I used were more sensitive than the headphones I use at home, so the sidetone was louder than I’m accustomed to. Unfortunately, I couldn’t remember how to adjust the sidetone volume, and I neglected to pack my little FT-817 cheat sheet. So, I just pulled the earbuds out a bit and continued on.
Since the picnic table was only 10 feet from my truck, I was able to use my homebrew 19-foot vertical.
Once I got going, using the FT-817 brought back a lot of memories of portable outings from years ago. Happily, the old rig still works like a charm.
Despite some fading on the bands, contacts came easily. In a little more than an hour, I made 21 contacts with four park-to-park QSOs. Most of my contacts were on 40M and 20M, with one contact on 30M (a P2P). I also had a contact with W1AW/0, but the operator didn’t give his location.
It was a lot of fun getting my trusty FT-817 back out in the field again. The FT-817 isn’t my oldest QRP rig; that honor goes to my 30 year-old MFJ-9030 transceiver. I definitely need to dust off more of my old rigs and give them some QRP-portable love.
Today was the last day of a heatwave we have been experiencing this week. It was the only free day for me this weekend, so I headed out to Evansburg State Park (K-1351, KFF-1351) for an activation. Having had a heat-related issue recently, I wanted to get out early and keep it short.
I set up my trusty Penntek TR-35 (5 watts) and homebrew 19-foot vertical. As is my normal practice, I started out on 40M CW. Before I started calling CQ, I made a park-to-park contact with a station in Maryland. Things got off to a slow start, but I managed to make my first 10 contacts in about 15 minutes.
I moved up to 30M and started calling CQ. The first station to call was NJ2BB. I immediately recognized the callsign as the amateur radio station aboard Battleship New Jersey (BB-62). The New Jersey is a WWII-era battleship, which is now a museum ship in Camden, New Jersey. I chatted with the operator, Tom, for a bit letting him know I was a former U.S. Navy Radioman, I always enjoy contacting museum ships; however, this was the first time one has called me.
USS New Jersey (BB-62) in California, 1985 (DoD photo)
After logging a few more contacts on 20M, I pulled the plug. After an hour, I ended up with 28 QSOs in my log, including two park-to-park contacts. The NJ2BB contact was certainly the highlight of my outing this morning.
My QRP-portable operations seem to have come to a grinding halt this month. I won’t bore you with the reasons, but a quick POTA activation today ended my slump.
I spent about an hour today in Valley Forge National Historical Park (K-0761, KFF-0761), parked in one of my favorite spots. The propagation forecast was less than spectacular, but I forged ahead.
WB3GCK at Valley Forge National Historical Park (K-0761, KFF-0761)
Using my trusty Penntek TR-35 and my homebrew vertical, I started out on 40M. After calling “CQ” a few times, I received an ear-shattering call from W1AW, the station at ARRL Headquarters. The operator identified himself as “John,” and said he was operating from “the Mothership” in Connecticut. That gave me a chuckle. What a great way to start an activation.
I normally reduce the power output of the TR-35, when I’m tuning up. After three or four contacts on 40M, I noticed I had forgotten to turn the power back up. So, for the first few contacts, I was only running a couple of watts. I guess band conditions weren’t all that bad after all.
After an hour, I had 15 contacts in the log, with two park-to-park QSOs. My best “DX” today was California on 20M.
It was just a short outing, but it sure felt good to get back out there.